Softwares used: Zbrush, Maya, Substance 3D Painter.
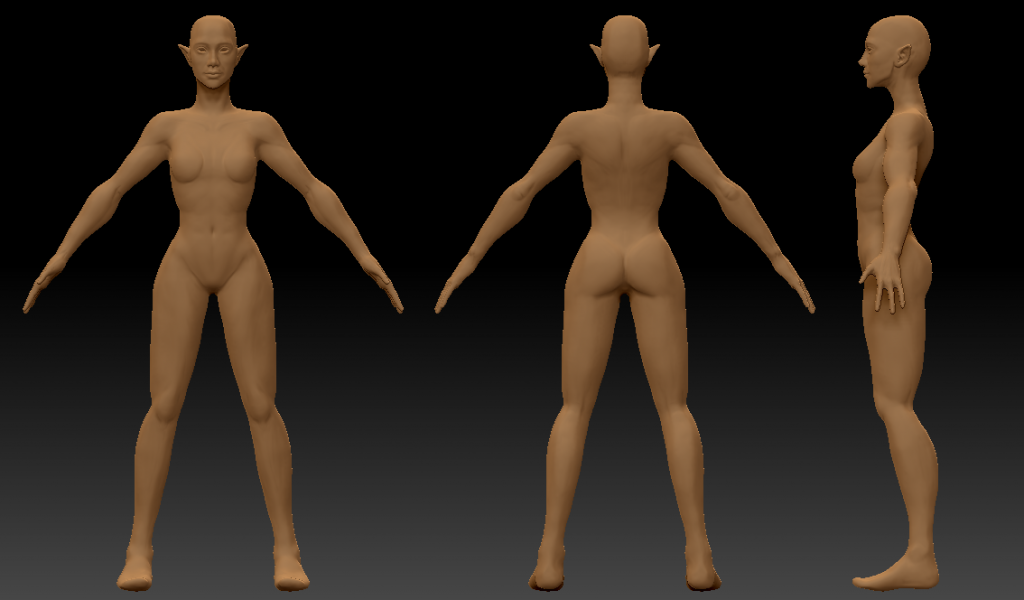
Sculpting the body
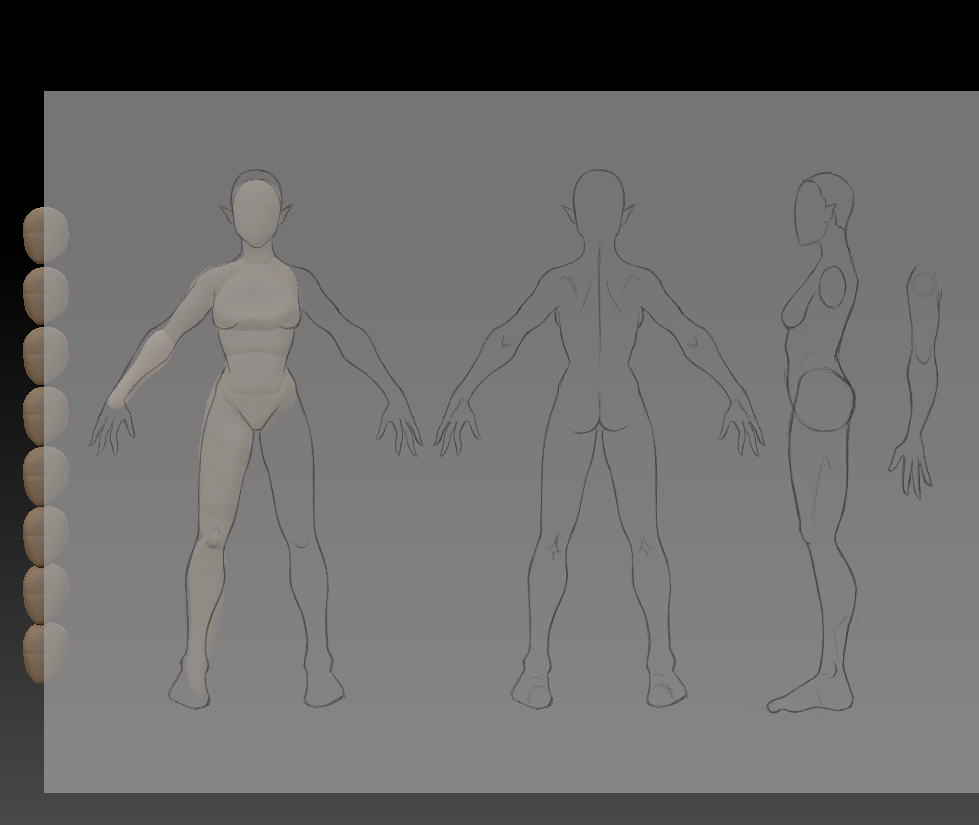
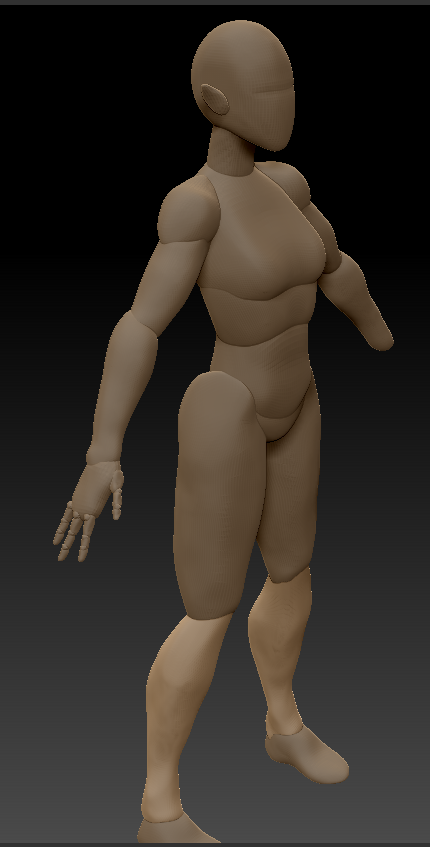
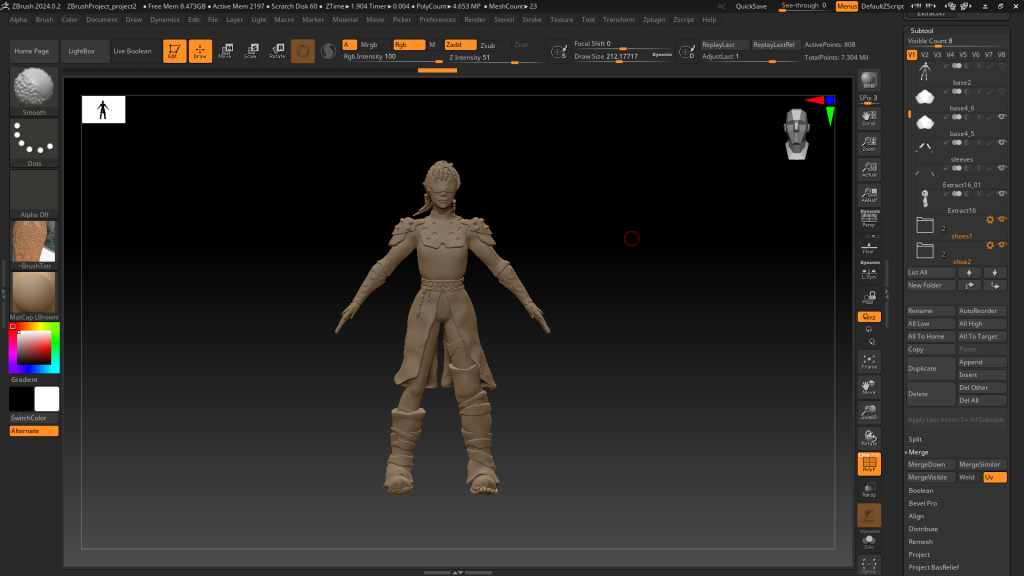
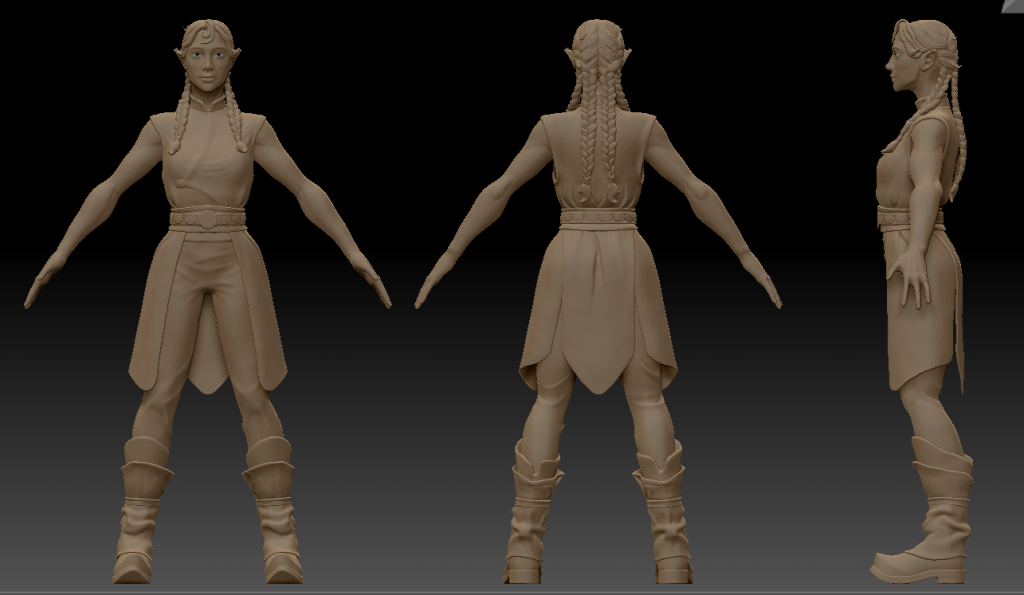
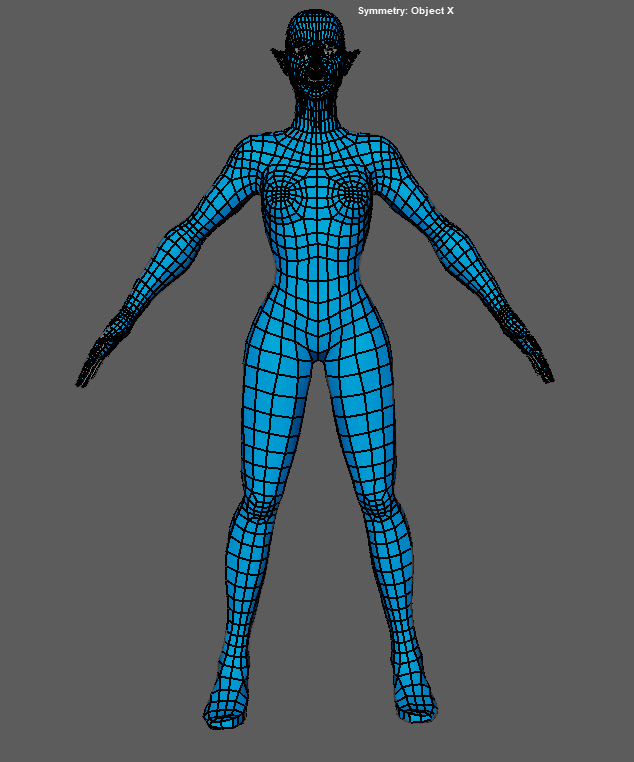
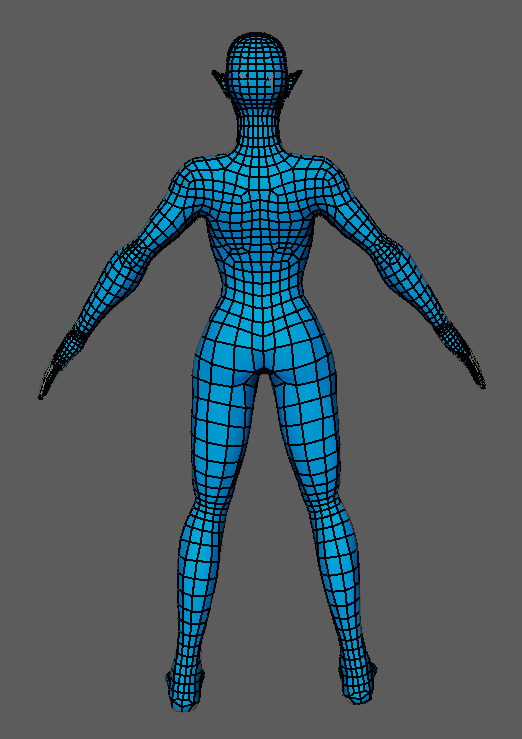
To begin, I followed a tutorial by 3D Mutiny to block out the body. I assembled the model with spheres, shaping them into each body part and then merging and dynameshing it all into one mesh. I borught my 2D drawing as reference through the texture function and used it to keep track of my proportions. Then I started sculpting muscle and details on to the model. I had a separate reference for head proportions too.
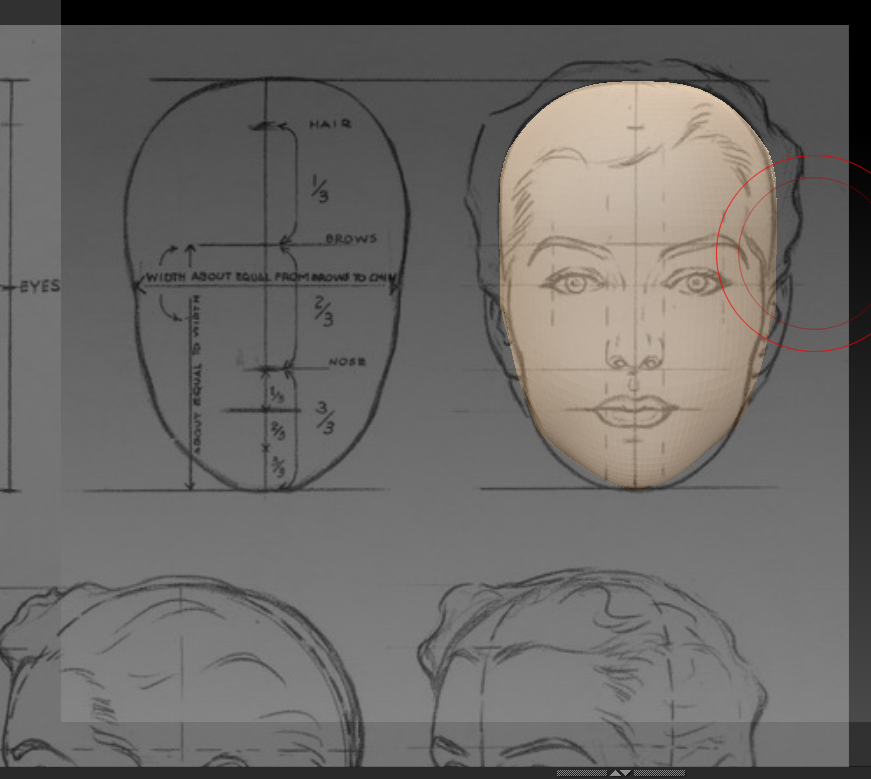
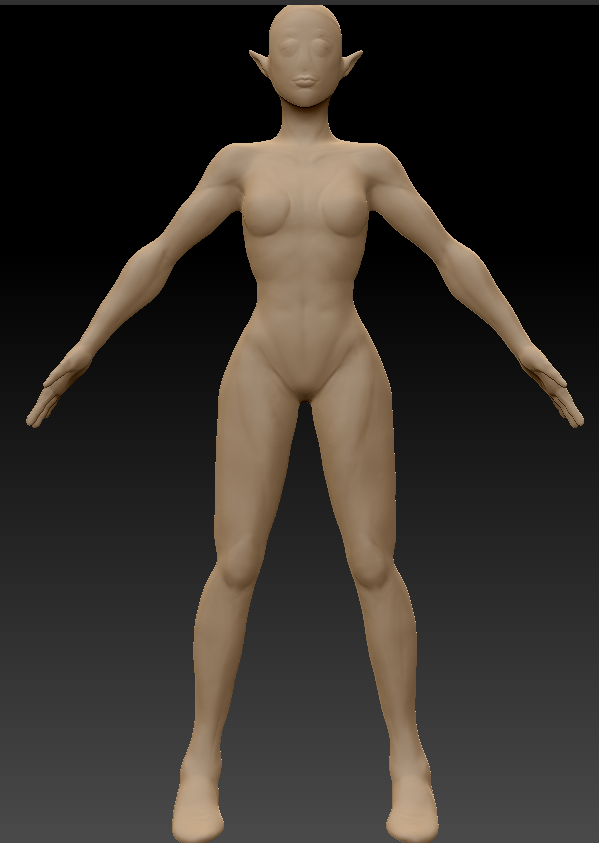
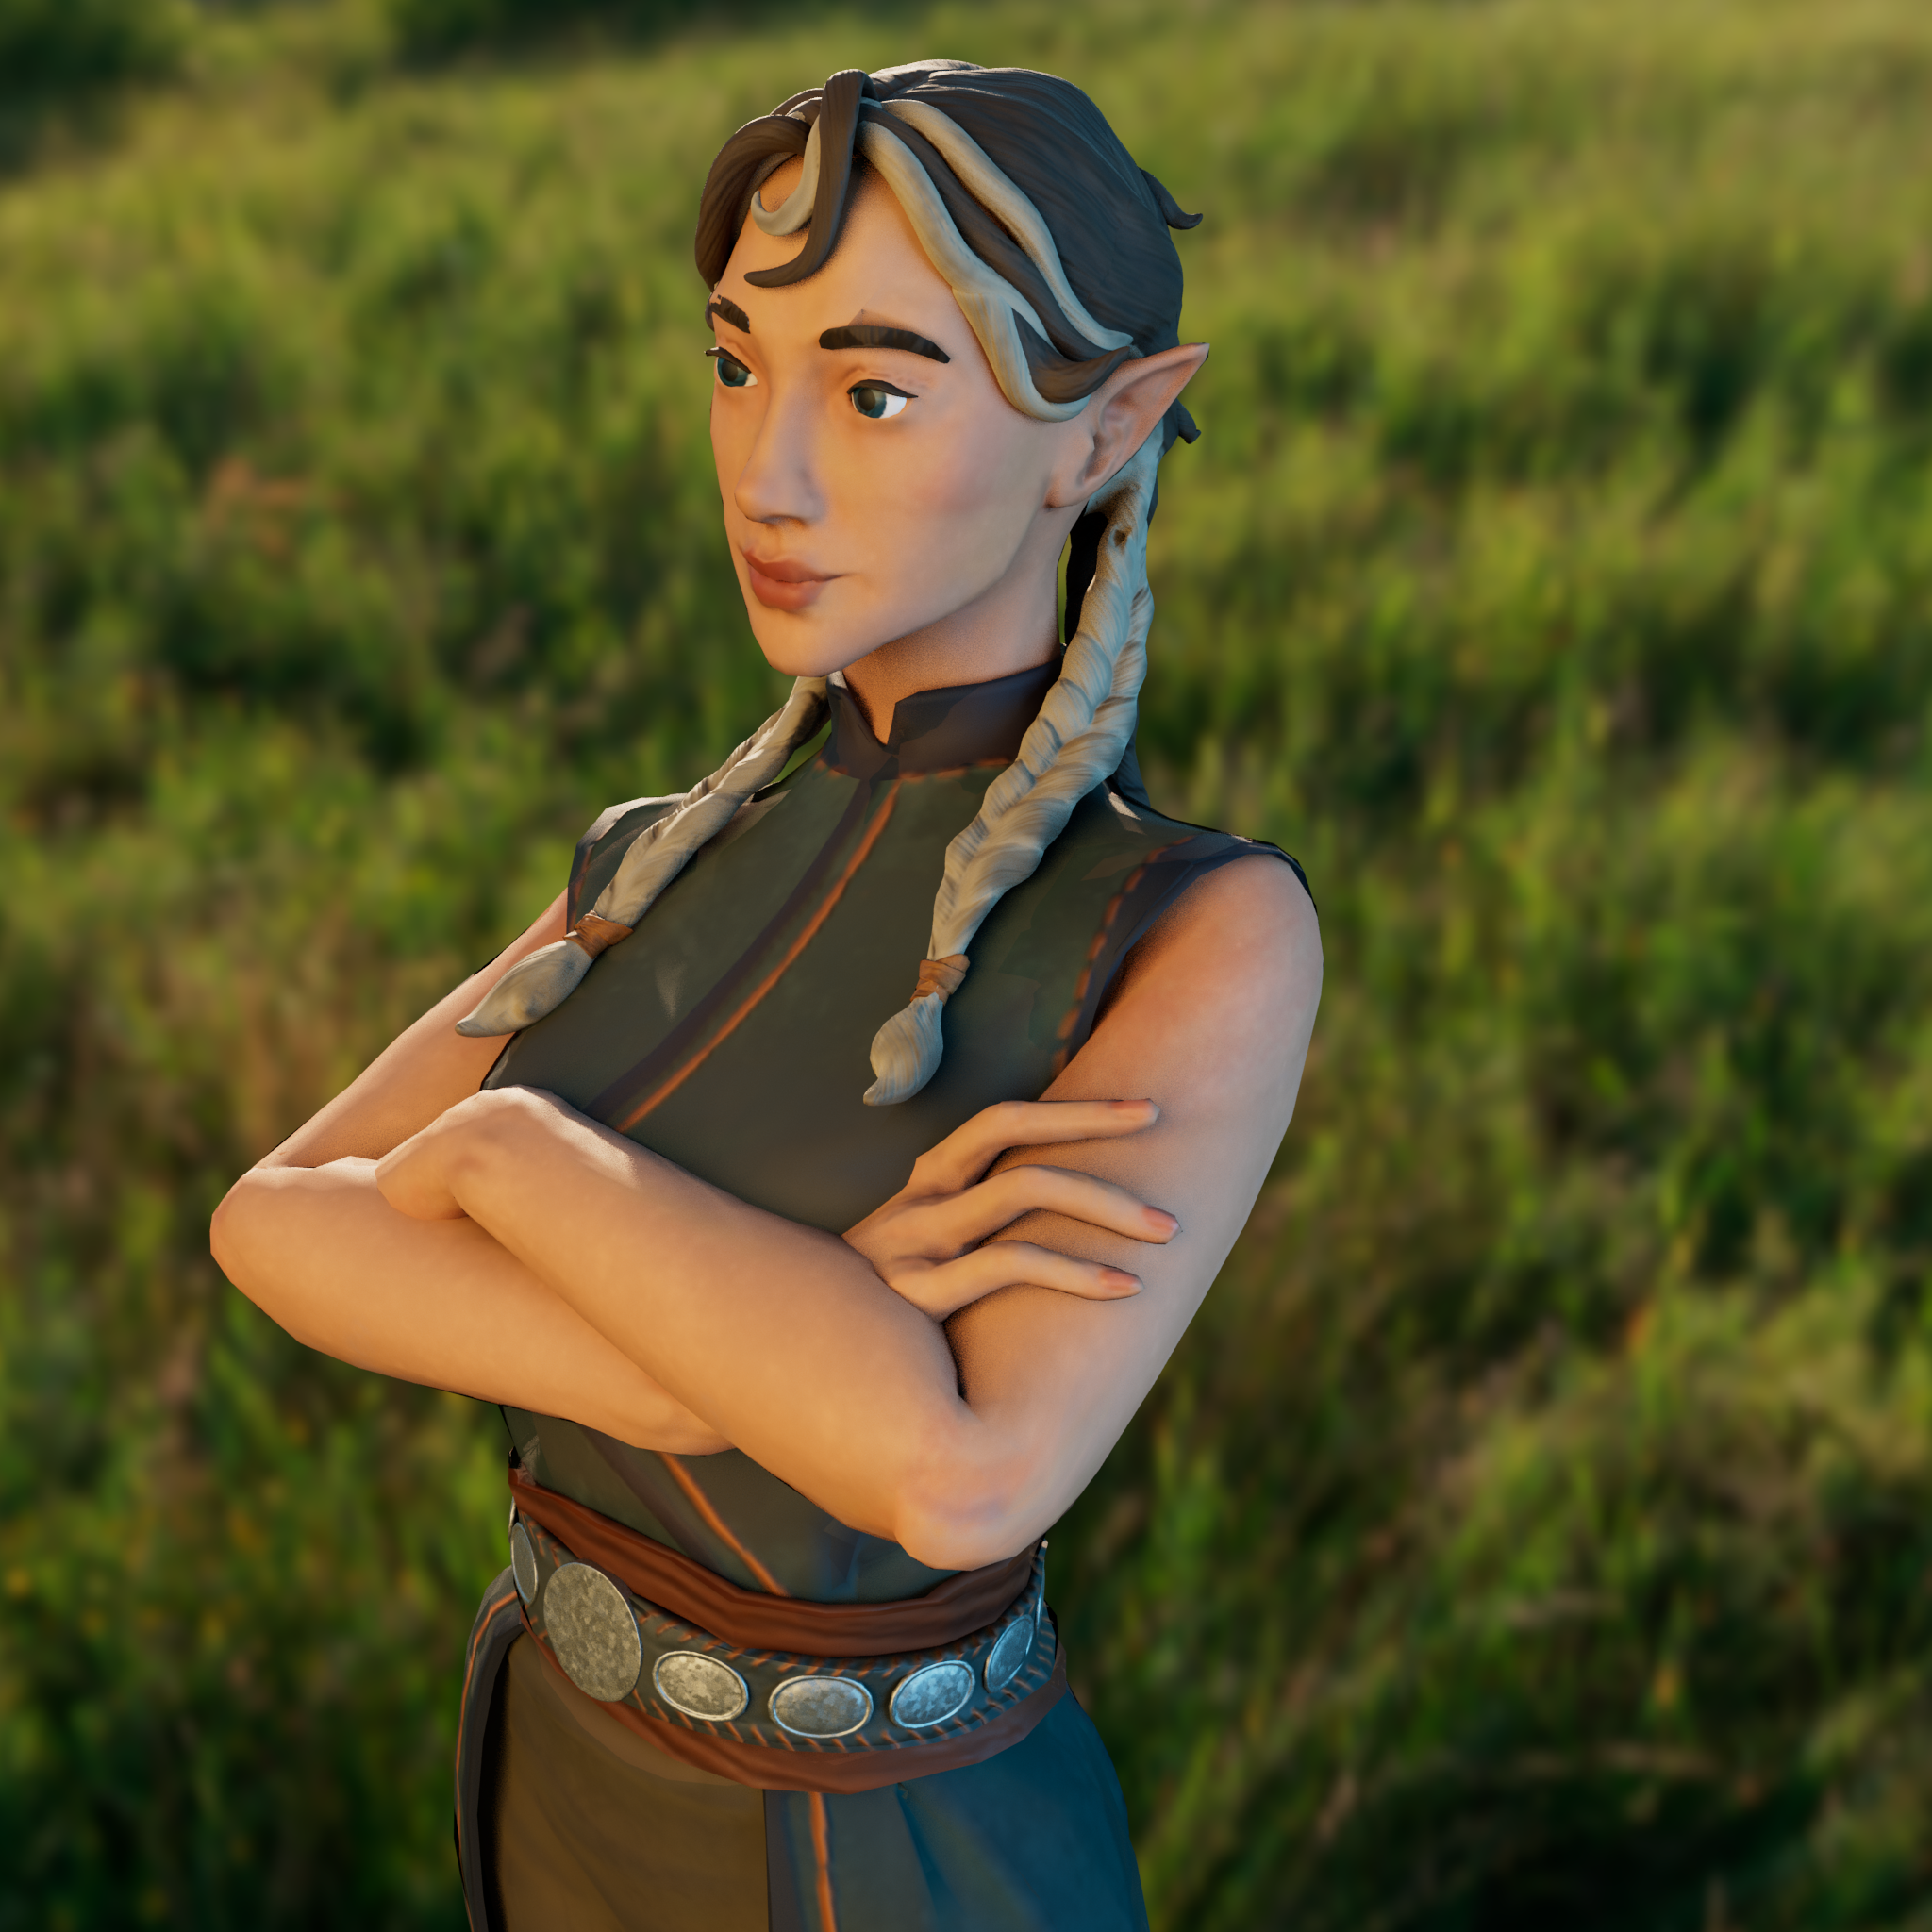
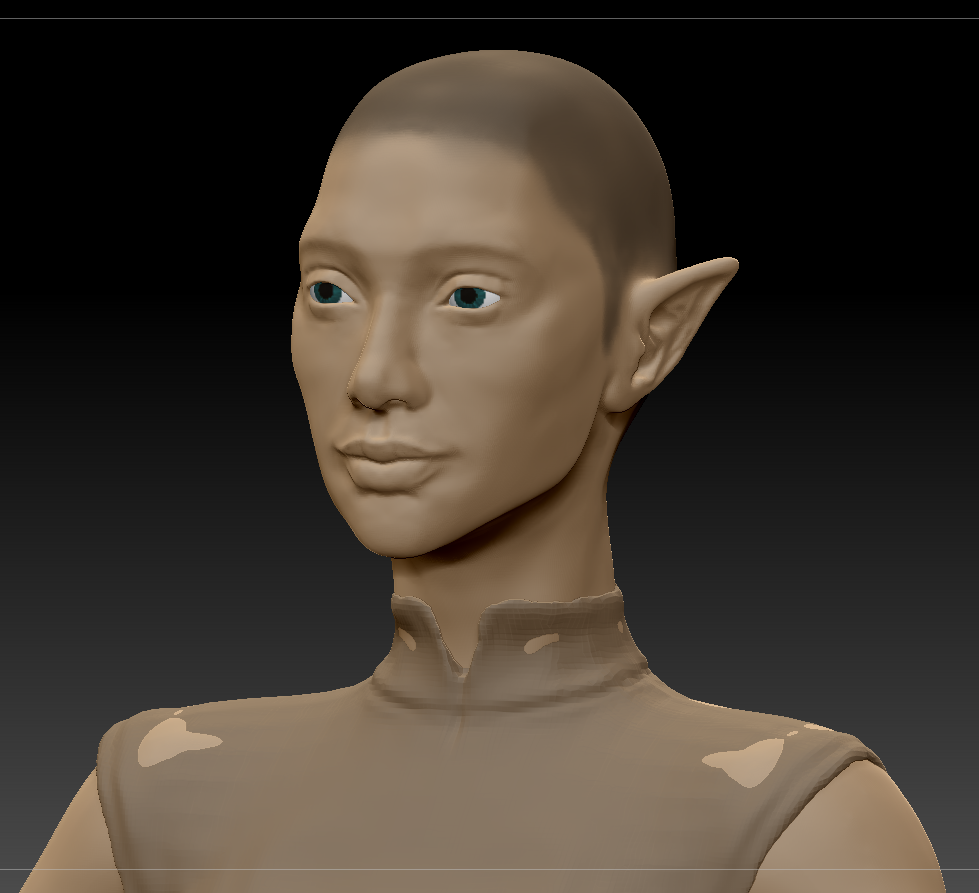
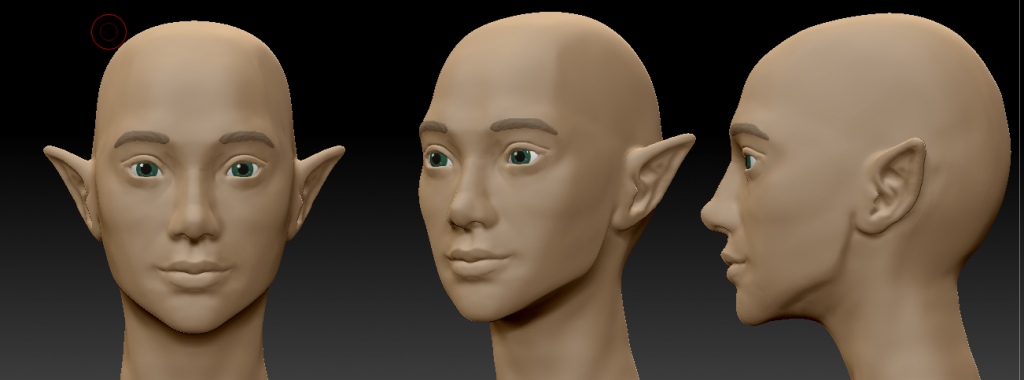
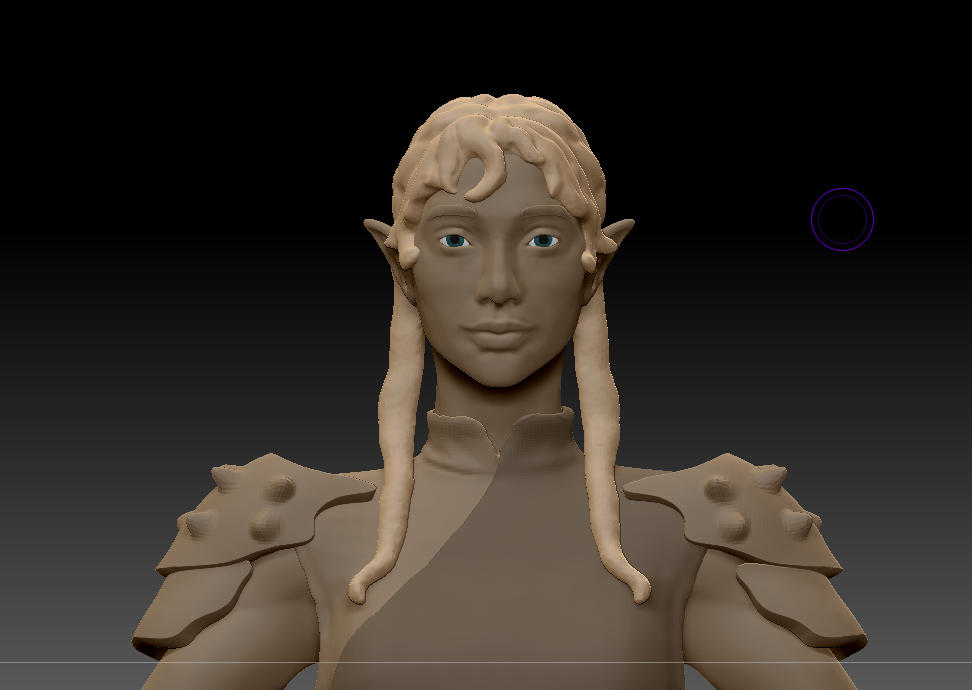
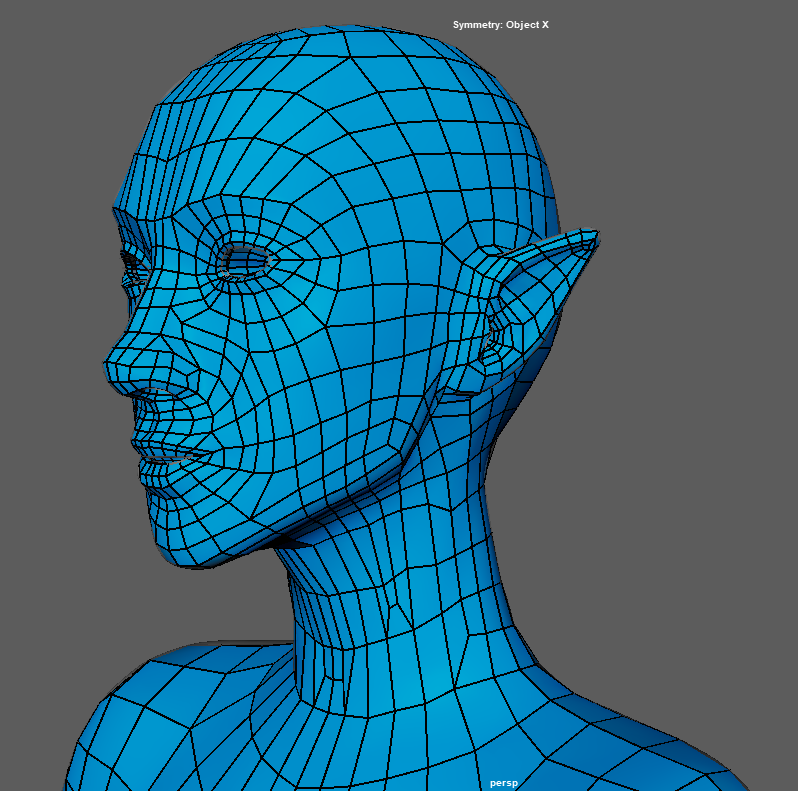
The struggle was the face and finding the right intensity for the subtler skin details. I wanted the model to be defined but not too stylized for the game. The face did not quite resemble the reference but I was not trying to get perfect likeness. Although I am satisfied with the result I did feel the need to practice sculpting more on my own time. Later, I tried editing the sculpt because at some point I accidentally lost the details like the nose definition, possibly dynameshing them away without realizing it. I worked on layers to keep control of how much I am changing and I noticed the edited version was starting to look unnatural the longer I worked on it. I was overworking it so I just lowered the intensity and only kept the subtle changes on some specific parts like ears and nose to returned definition.
I was especially struggling with the lips and eyes. The tutorial mentioned that the eyelids should be thick on 3D models even in the realistic style because that is just looks and works better. Making them thinner makes the face look bizarre. I kept trying to make the eyes bigger because even with references and using eyeballs for proportion it seems I somehow always ended up making them smaller. The lips were a challenge because of how they stick out from the face and blend into corners. It took a minute to get a decent result out of. I did not sculpt skin details or pores in zbrush because I felt adding skin detail in substance would be more efficient and made more sense for my character.

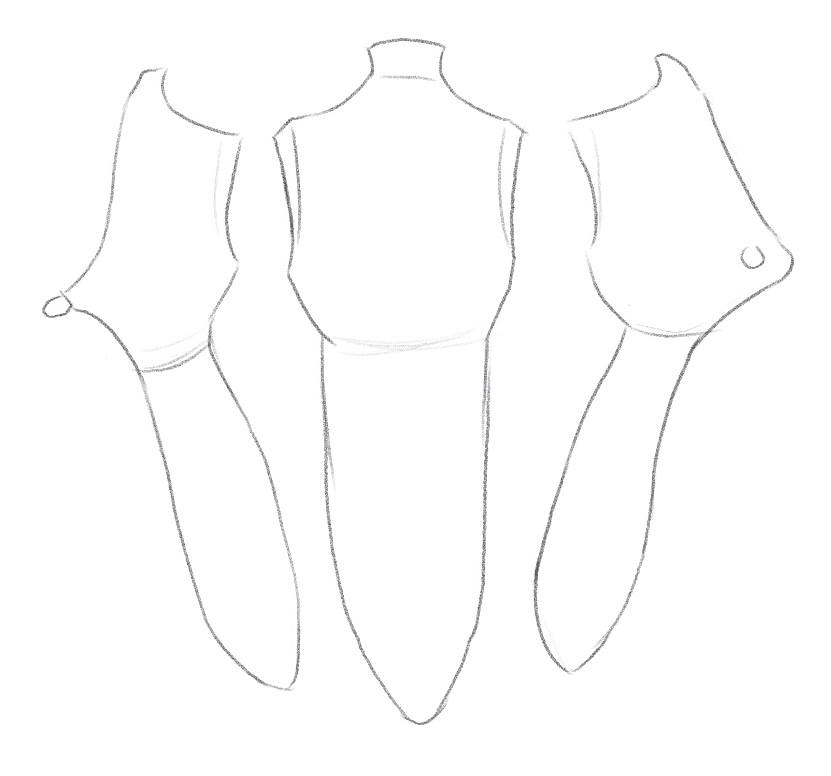
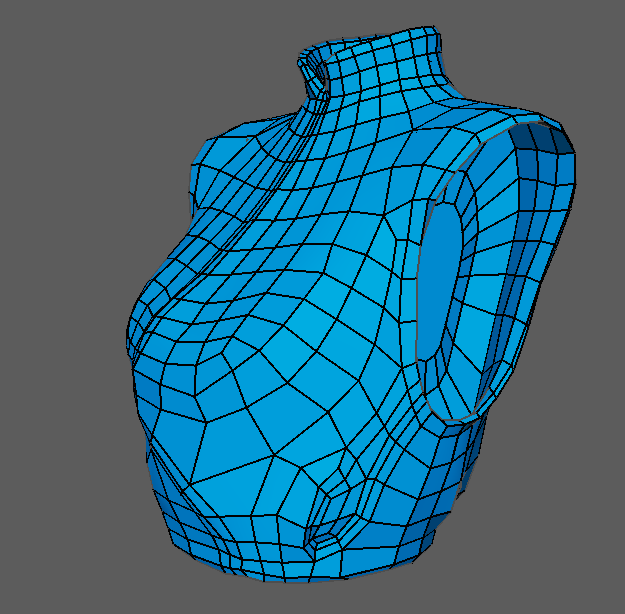
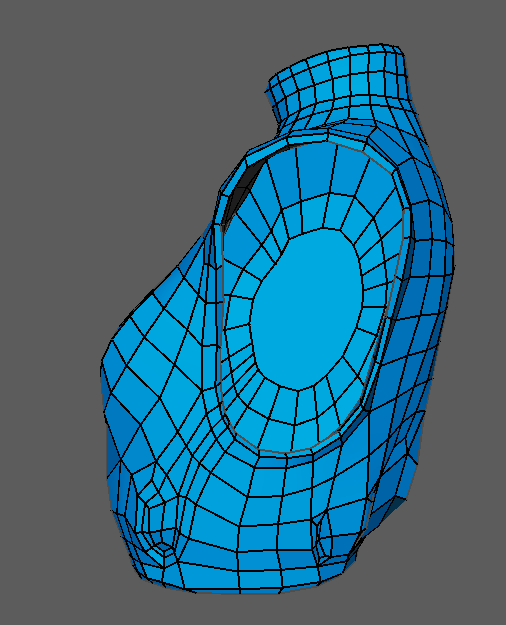
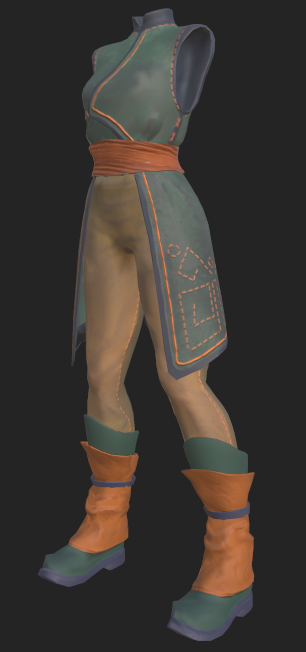
Costume creation
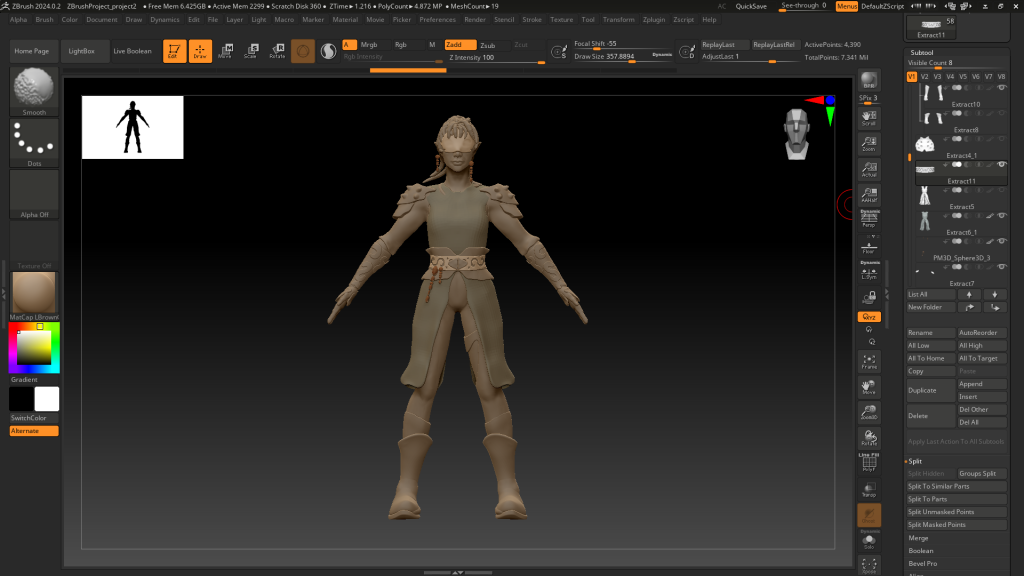
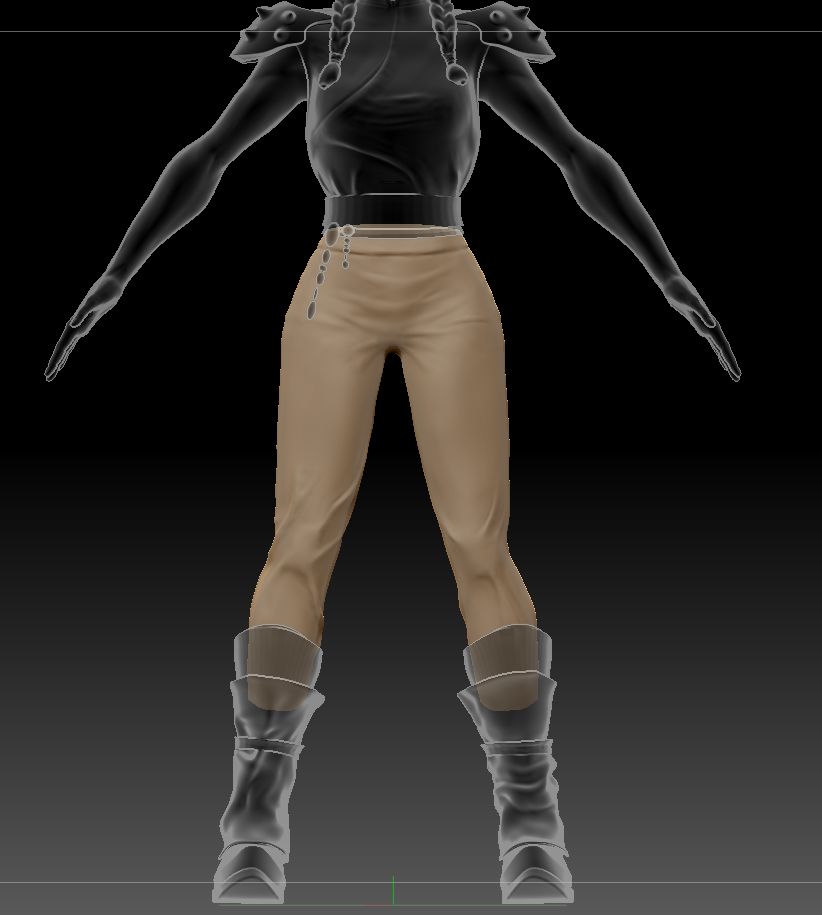
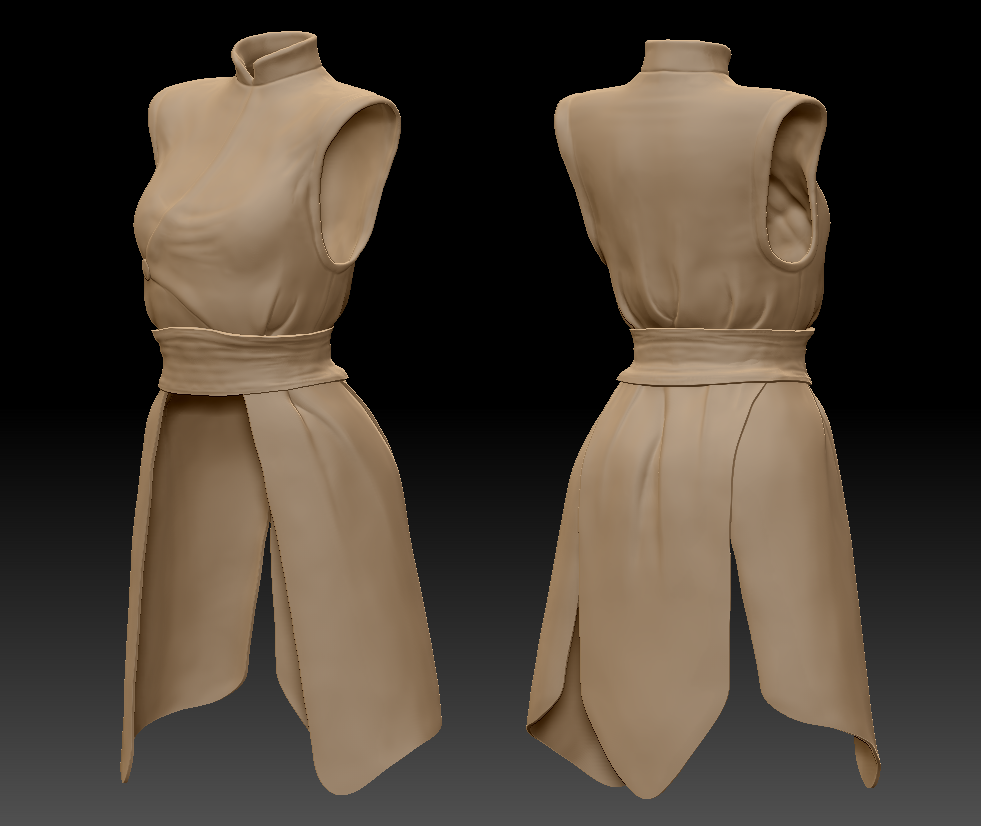
For clothes I masked the shapes on a lowpoly zremeshed version of the body and extracted the shapes from the subtool menu. After that I used different methods on different areas.
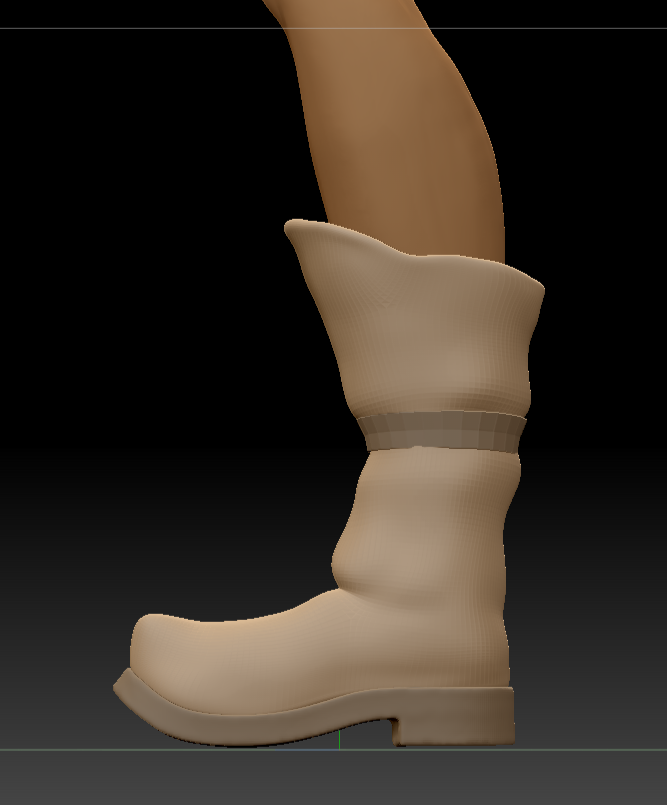
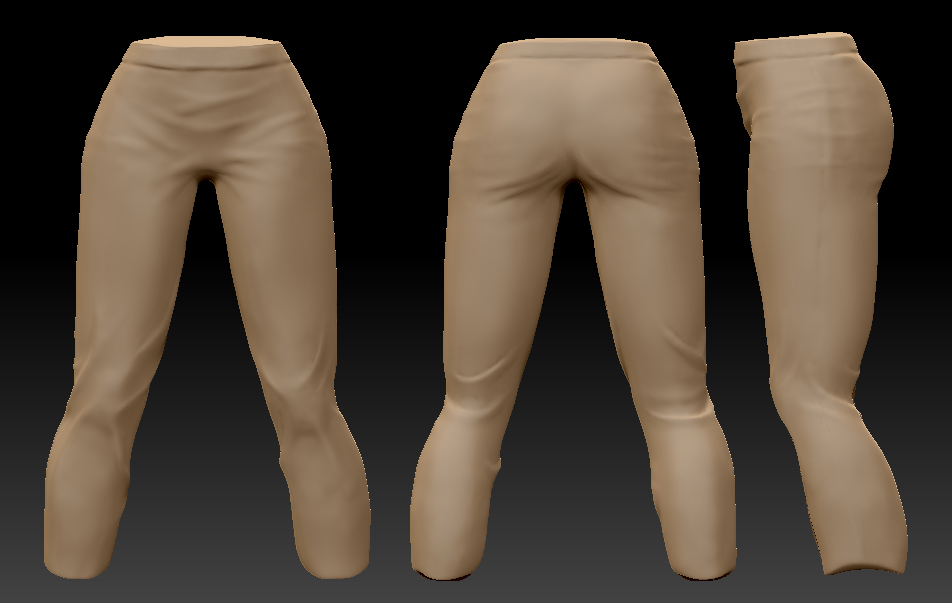
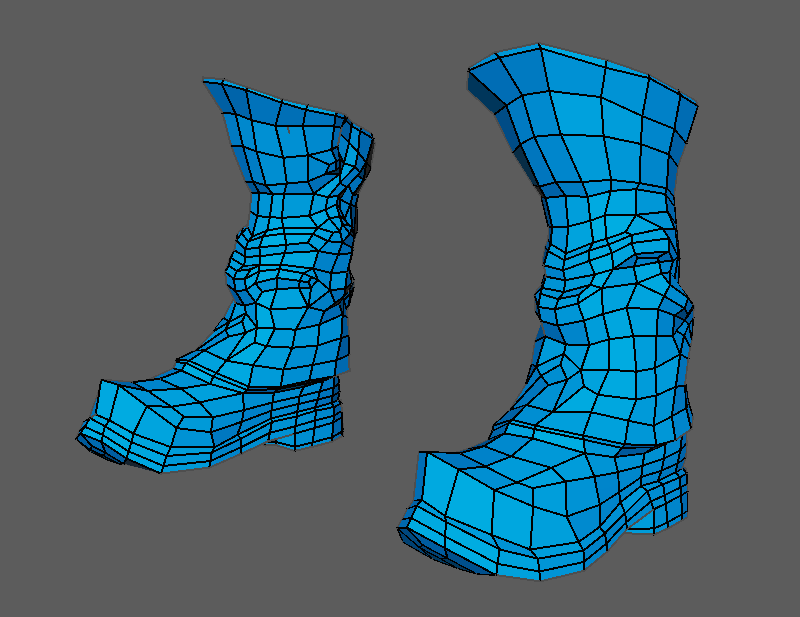
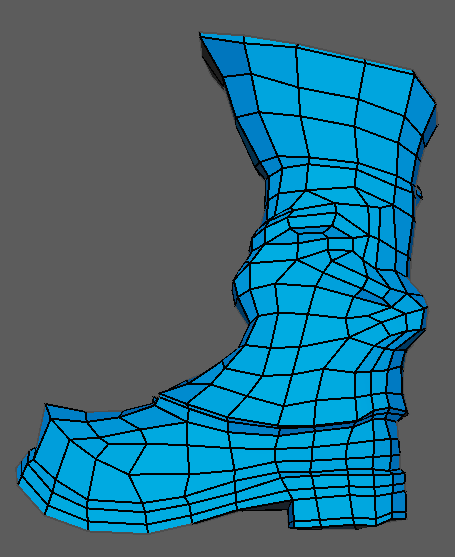
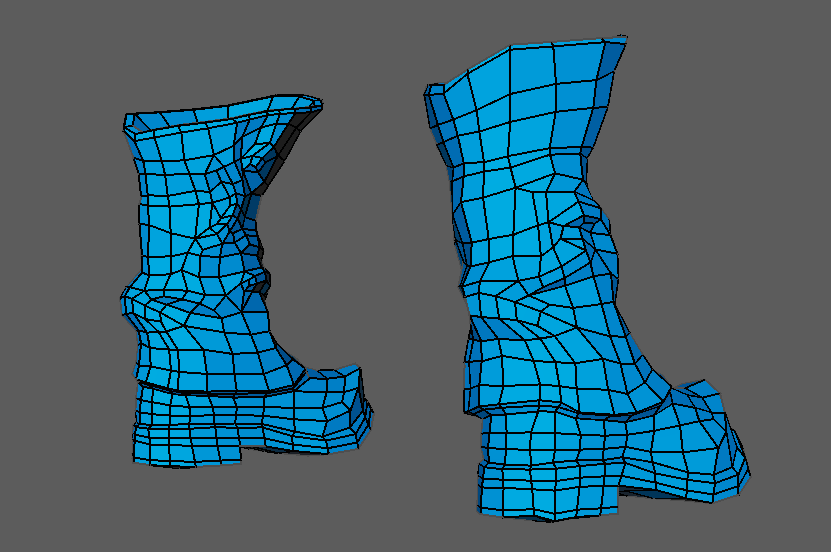
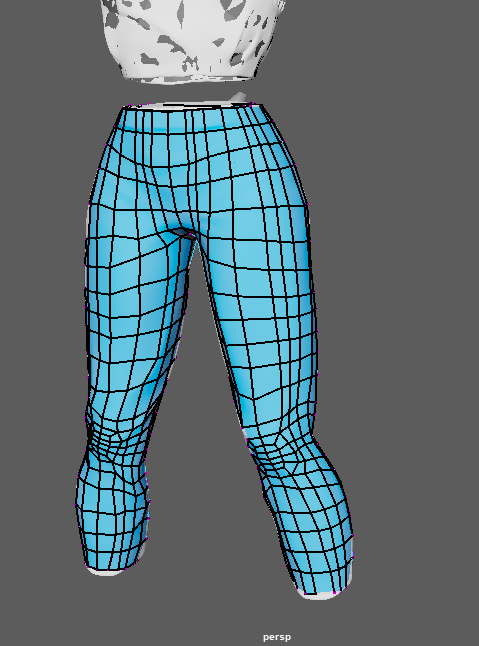
- The pants and shoe base were dynameshed into one filled mesh.
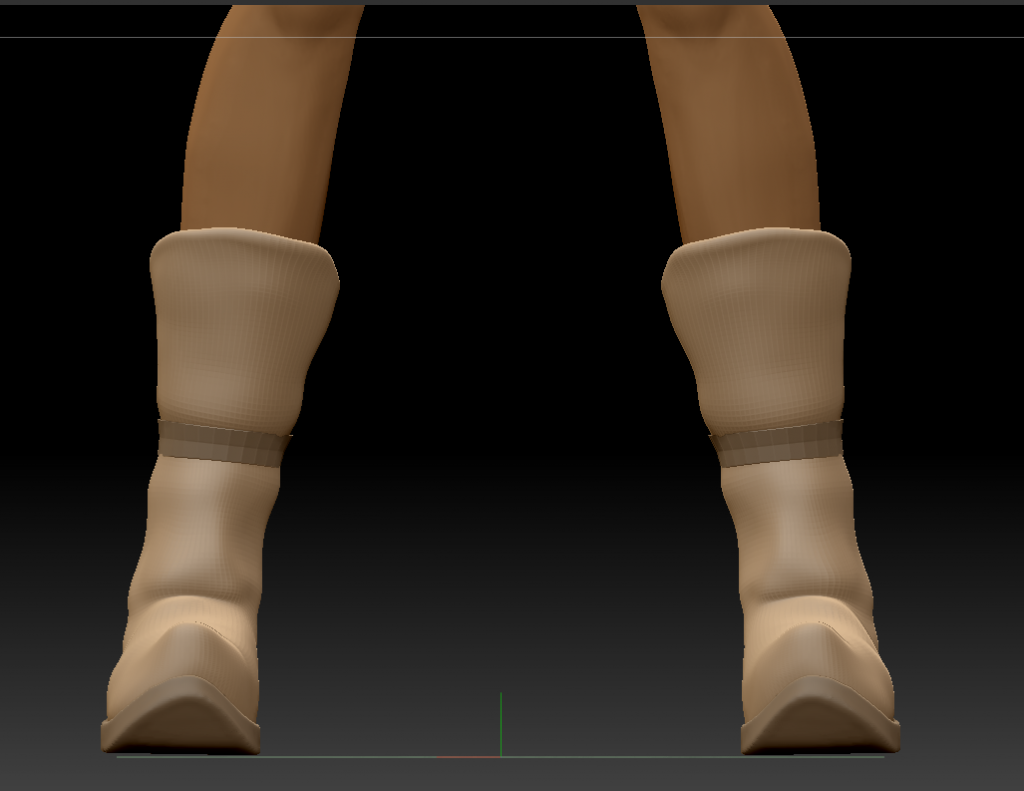
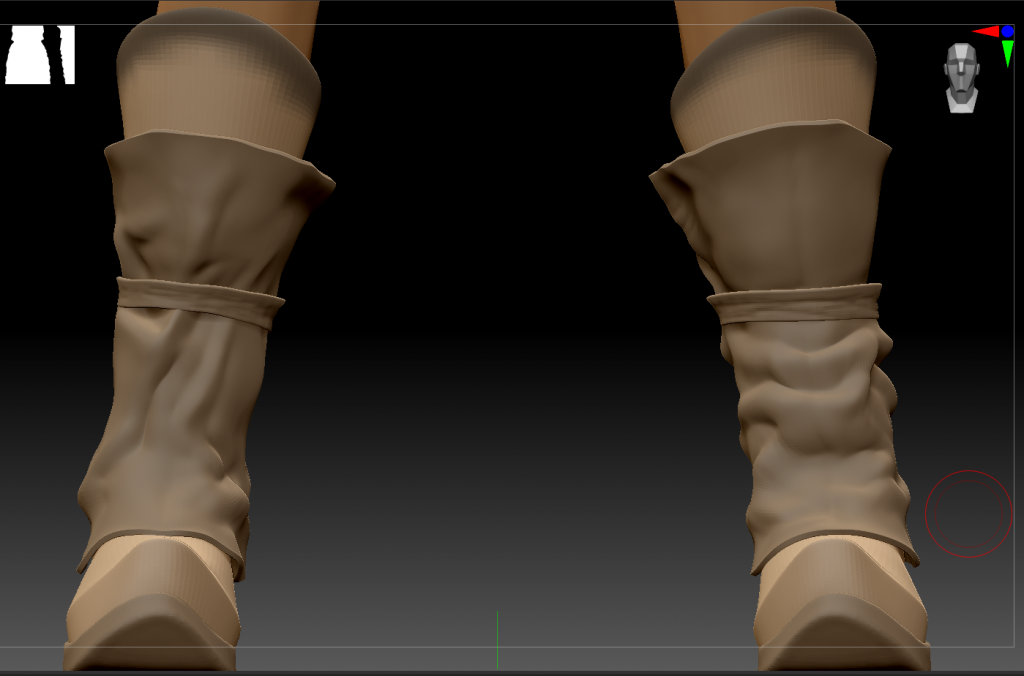
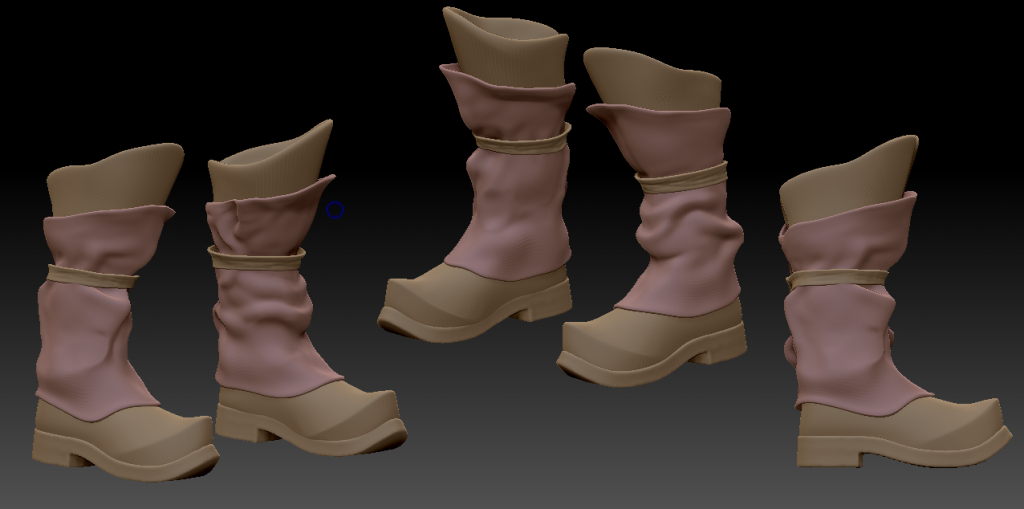
- The thinner fabrics like the vest, skirt of the vest, the flaps, soles and fabric around the shoes were extracted, had the backface deleted using polygroups, polished by features, zremeshed as needed for cleaner geometry and made thicker with dynamic sub.
- The belts and hairties were initially extracted by I eventually just used maya to quad draw or model belt, buckles, hairties etc. It was a simpler way to get these assets and sculpt details onto them.
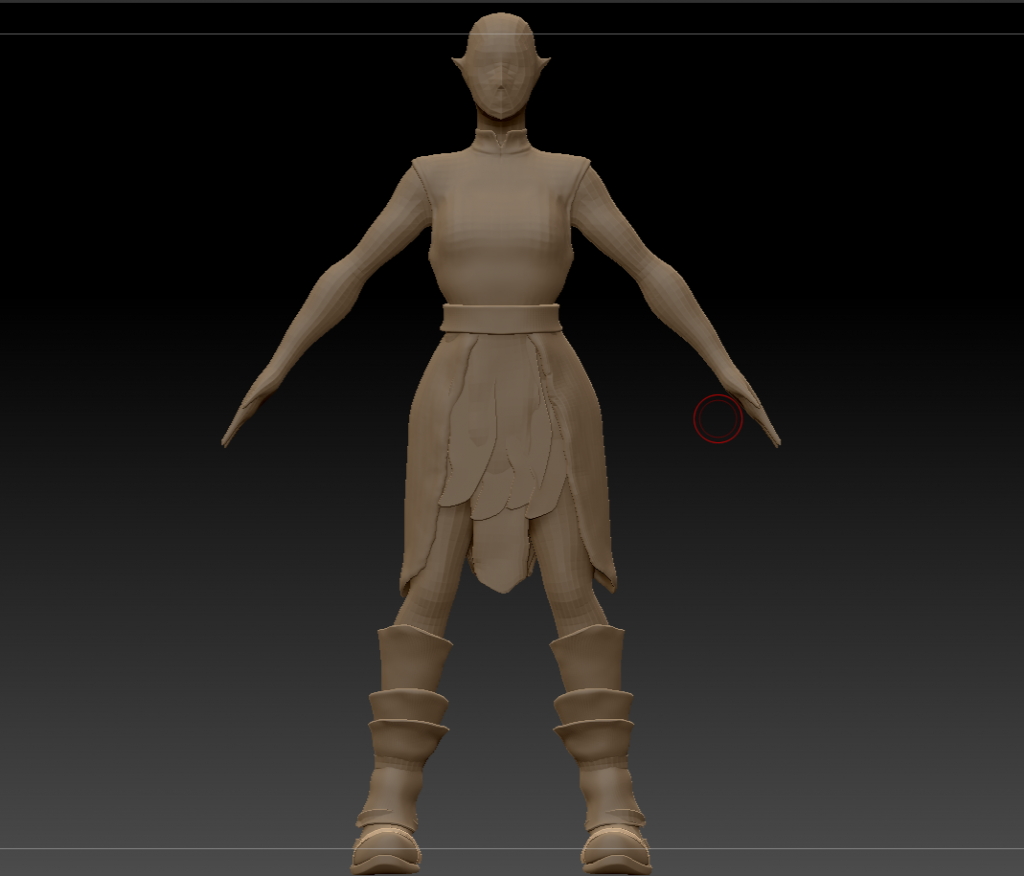
Sculpting the folds on clothes was a separate challenge as I was either making the stokes to light or too heavy. It started to seem like the pants were wet because the folds were too defined so I had to fix it as much as I could but I felt more details were better than less. I used references for the fold on pants. The areas around the knees and the folds that are tucked into shoes are usually the focal points for cloth folds so I tried focusing on those areas. At first I used the Alt+DamStandard, ClayBuildup or Pinch brushes to pull out the clothing folds that would then be defined, but later I found the Standard brush to be much more convenient for this process. After being satisfied with the result I moved on to the next step.
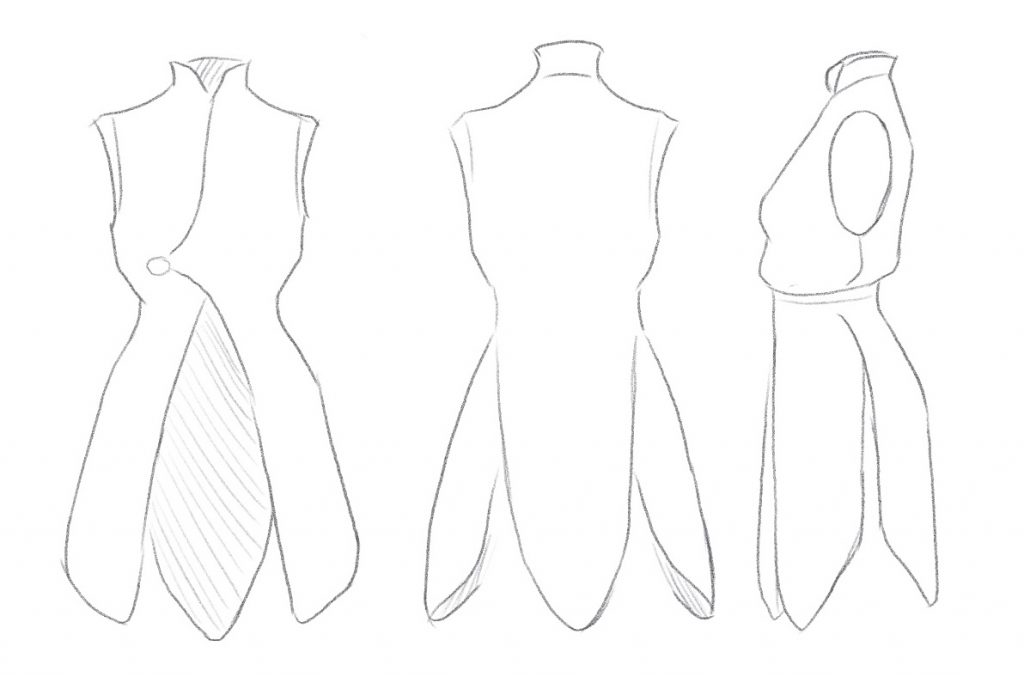
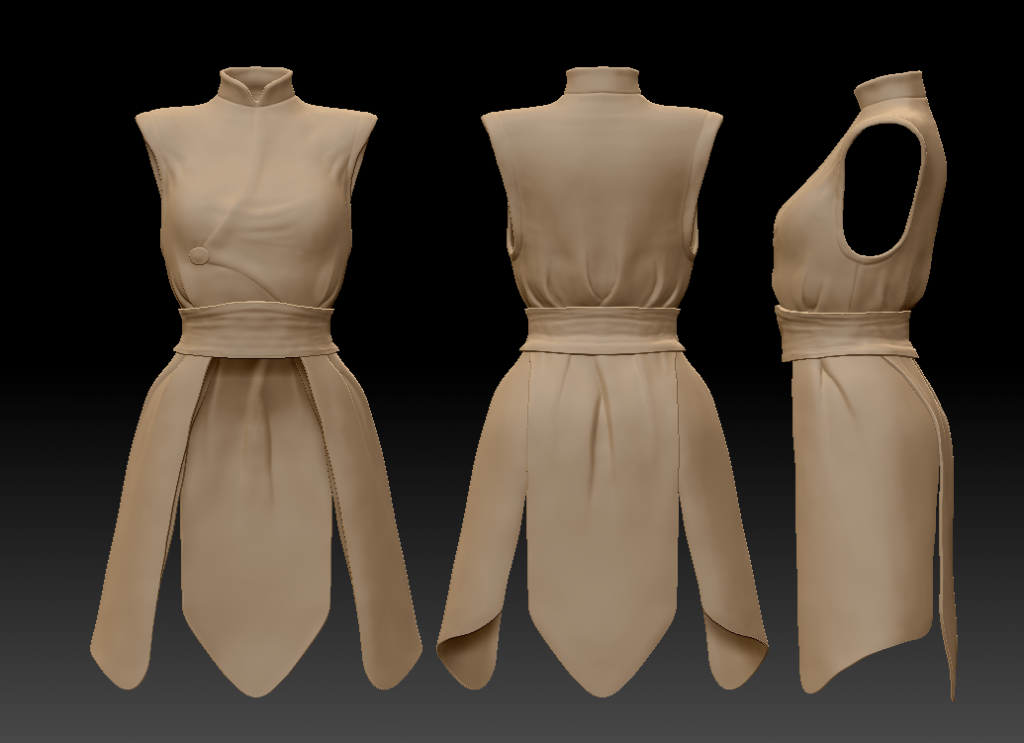
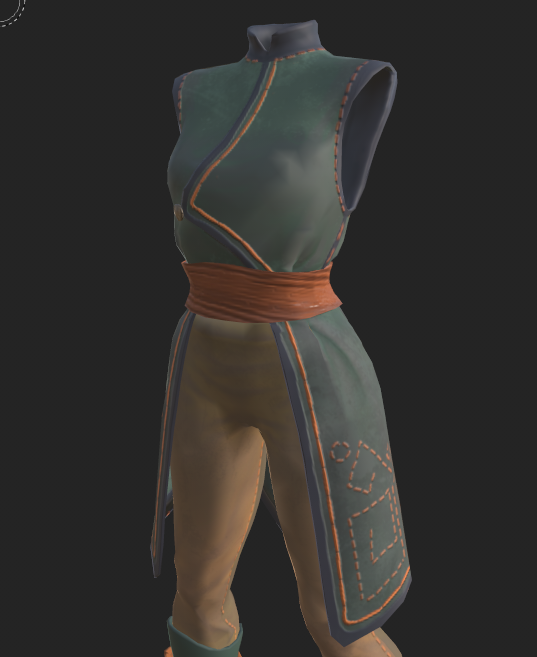
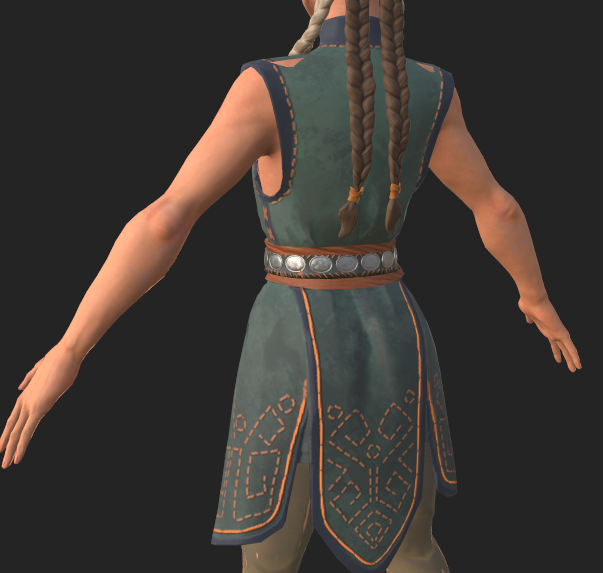
For the vest, I had many versions trying to figure out if I should add something on top or underneath as in some versions there would be ruffle sleeves, and if I did something should the vest on top be opened or closed. I played with the ideas until I made that triangle flap. I decided against adding more clothing layers as I was concerned that it might get too complicated for me to texture/rig and animate at my current level.
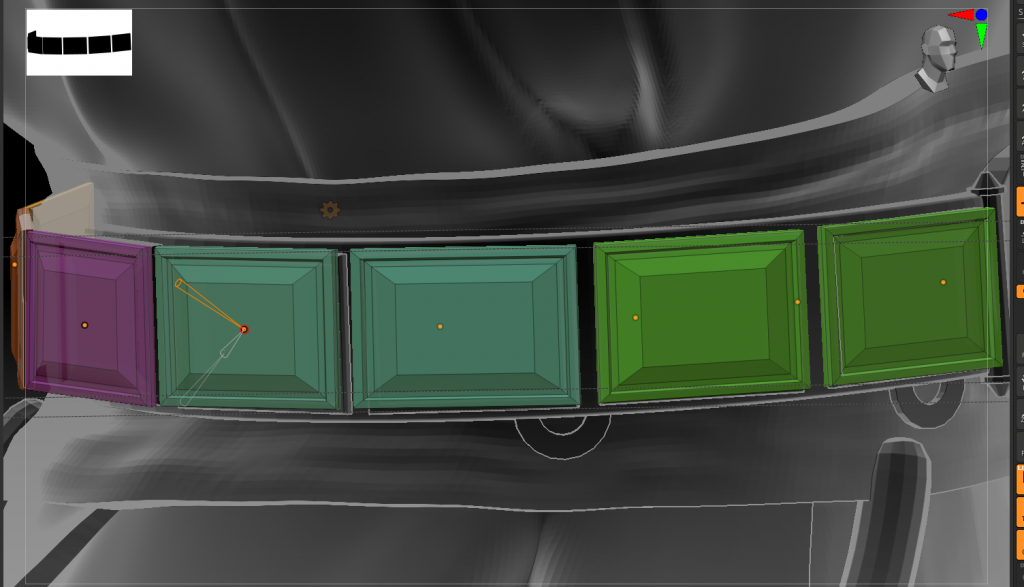
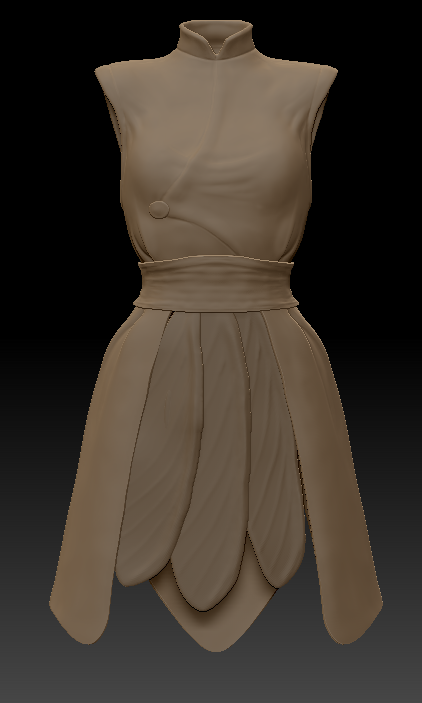
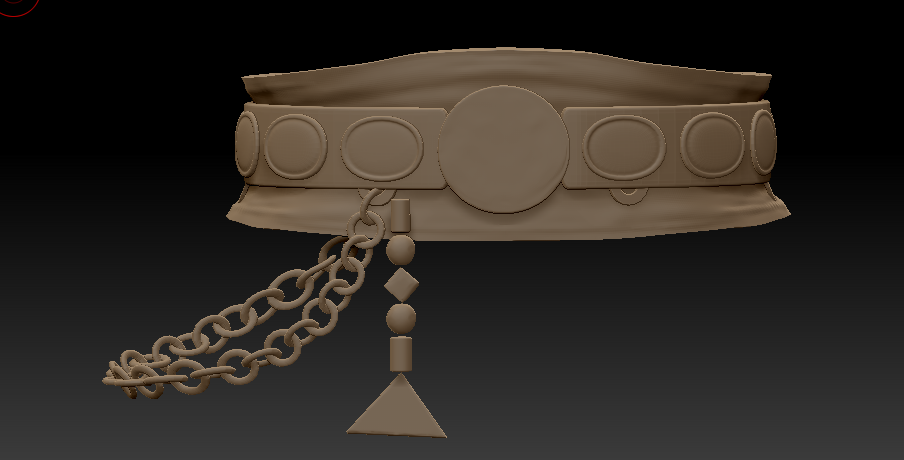
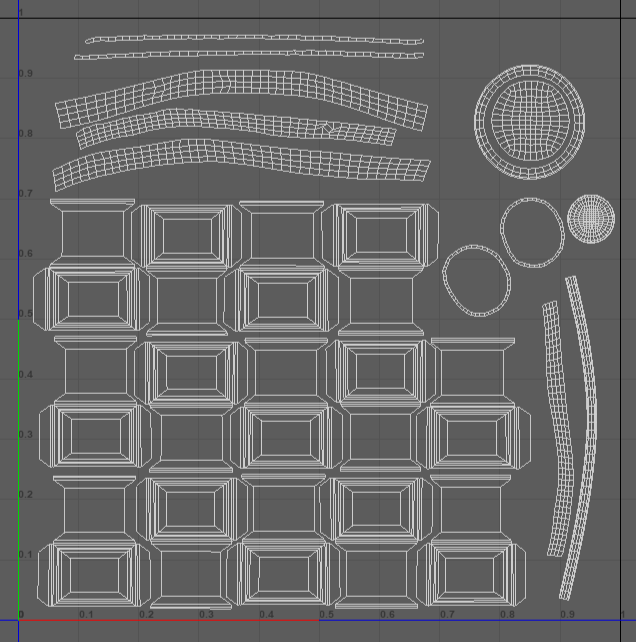
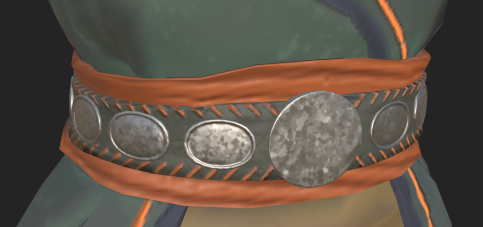
I knew from the start that I wanted a belt with ornaments but I had to figure out how I would produce that. I tried doing it in ZBrush but it wasn’t working out as well as I wanted so I decided to just quickly QuadDraw over the belt for clean topology and used that lowpoly as my base for the belt. I then made a simple model of the ornaments in Maya that would then duplicacted, moved into a straight line, merged into one subtool and bent into place using bend curves.
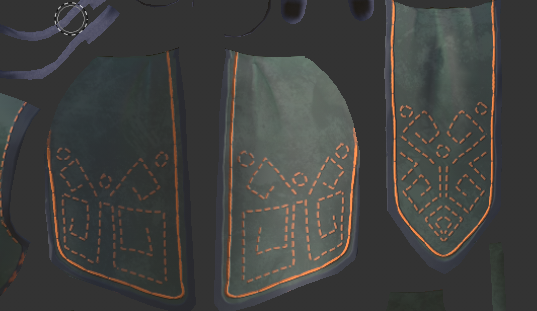
For patterns, I decided to paint them on in Substance. I had to think of what the patterns should represent since according to my research on the patterns on traditional jewelry, they usually mean something depending on the culture, mostly animal, plant or similar organic motives. So with that in mind I drew a simple pattern inspired by praying mantis on the bottom of the vest in Substance Painter.
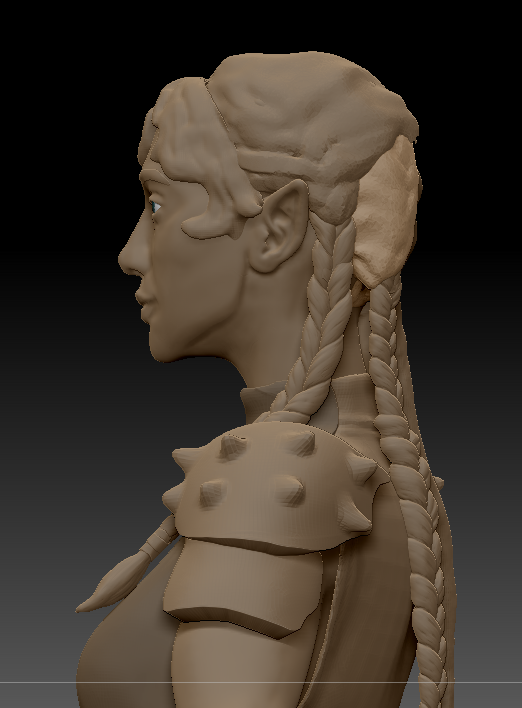
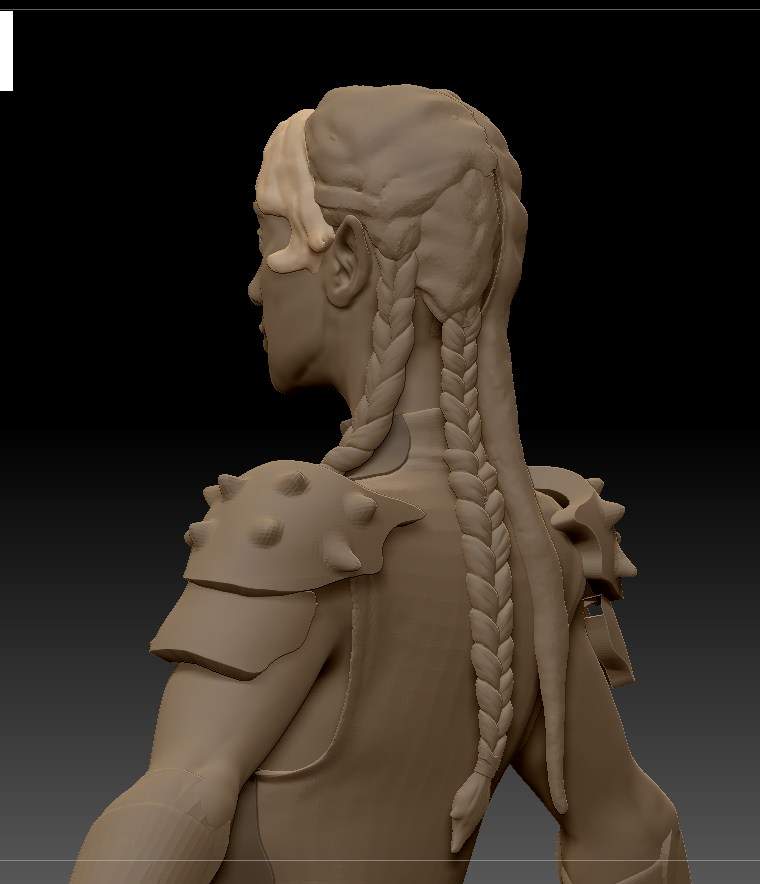
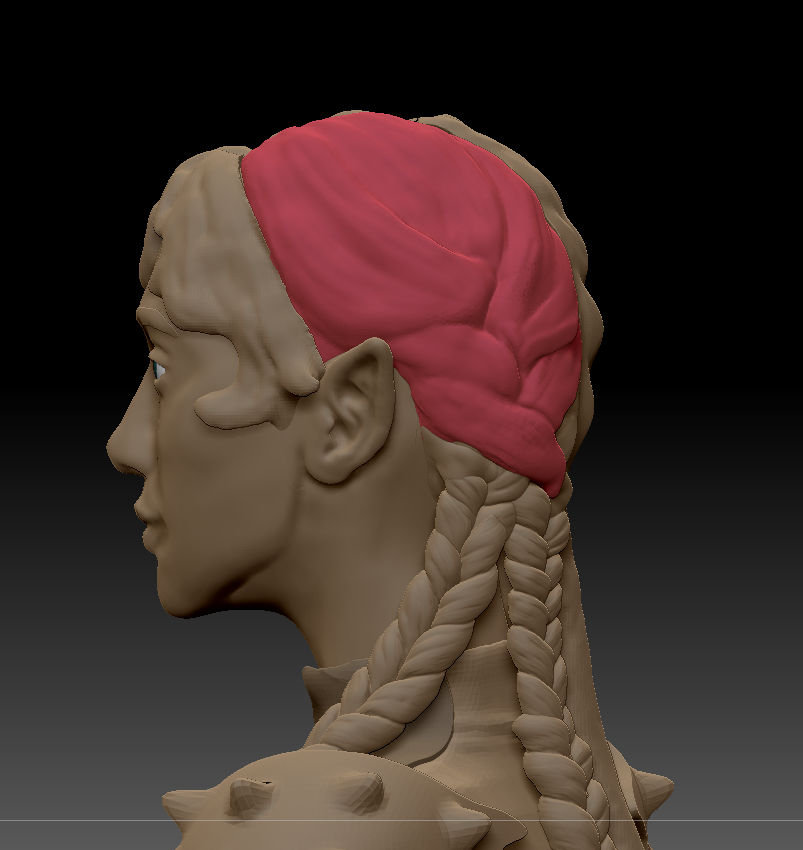
Figuring out hair
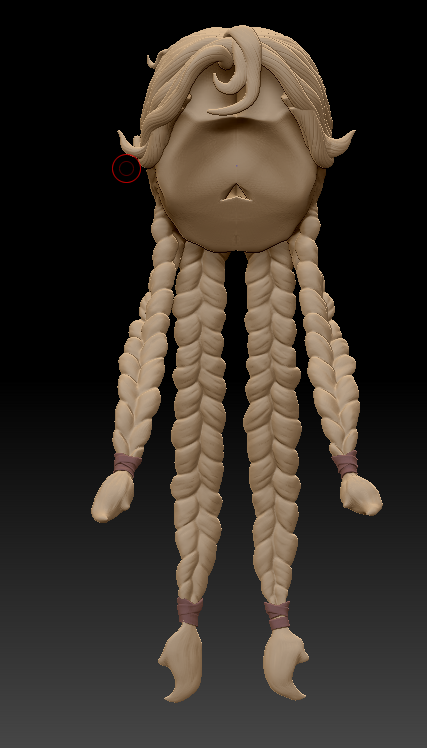
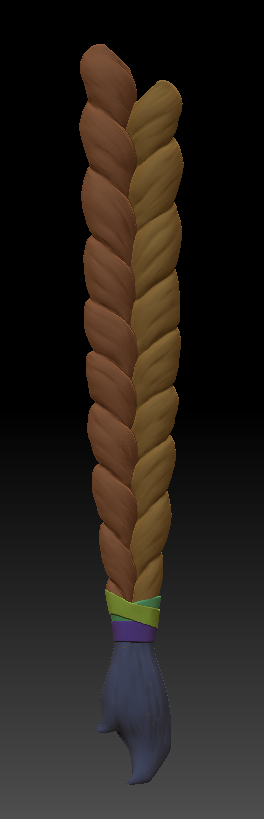
To create hair, first of all, I appended a sphere and shaped it along the hairline for the base of the hairstyle. This was once again done while watching 3D Mutiny’s tutorial. I also searched for all kinds of tutorials on how to make braids and a lot of them actually used three cylinders, deformed them and basically manually braided them.
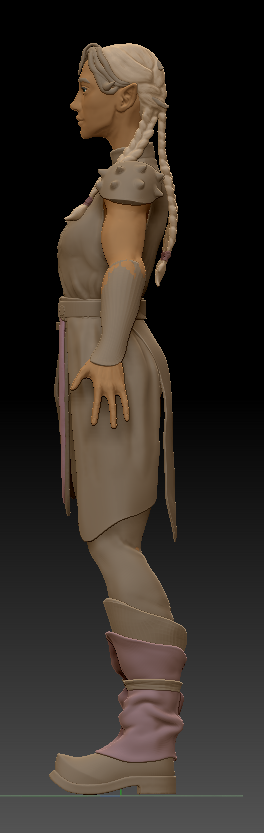
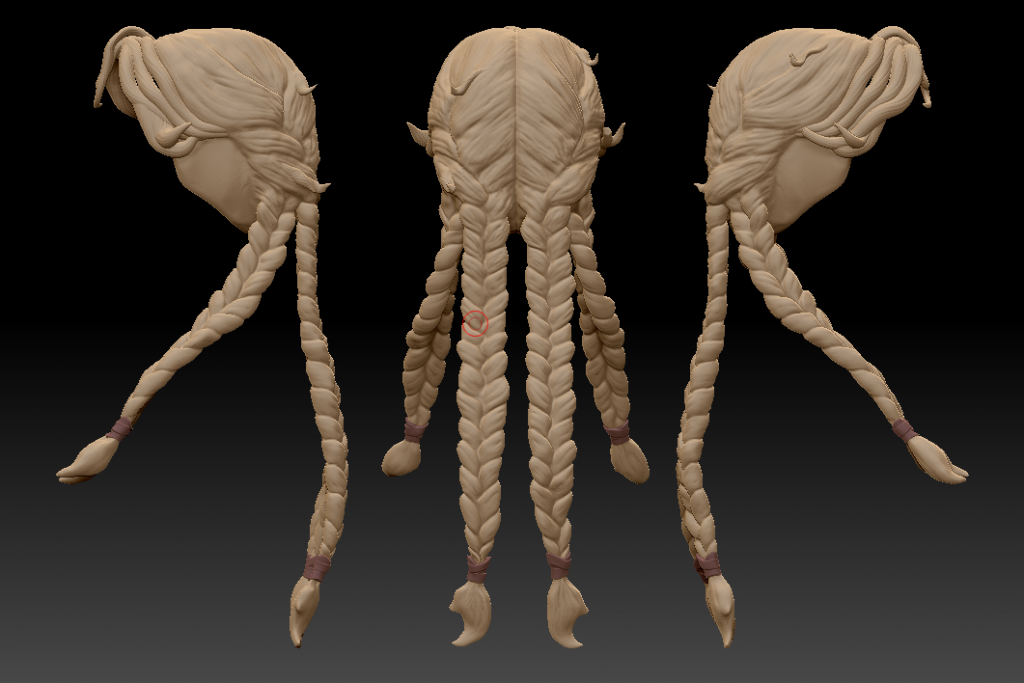
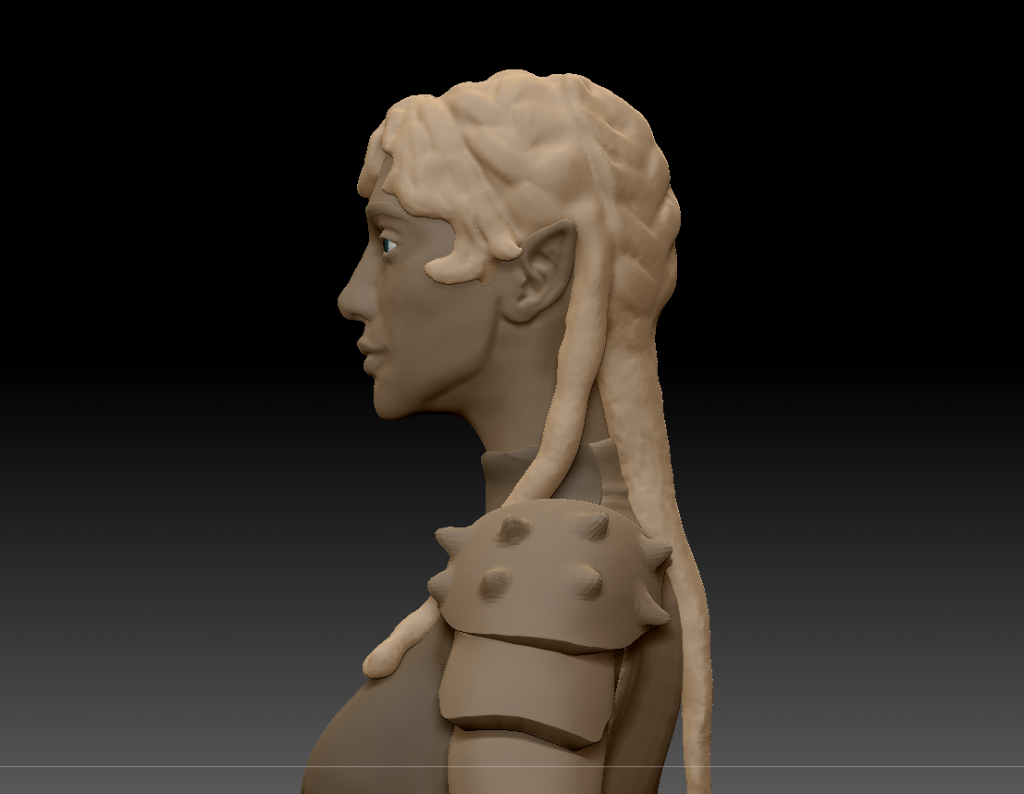
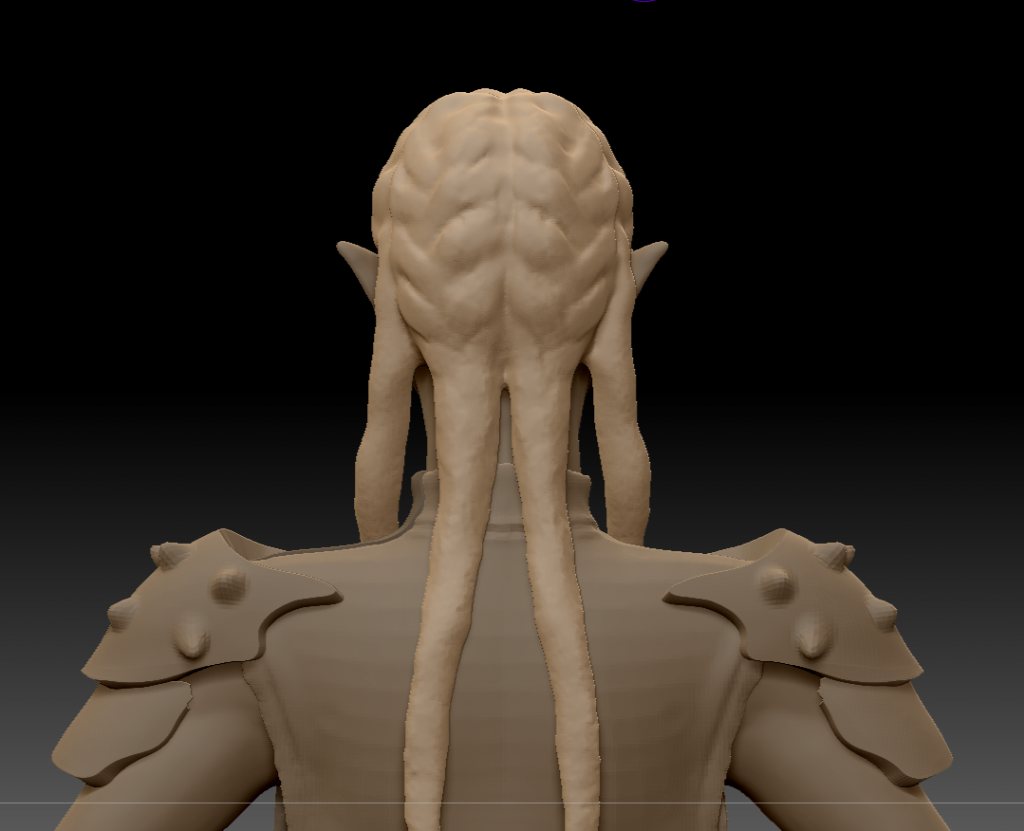
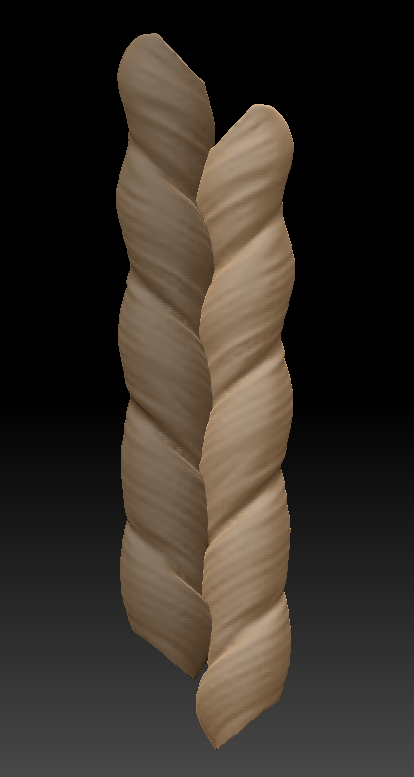
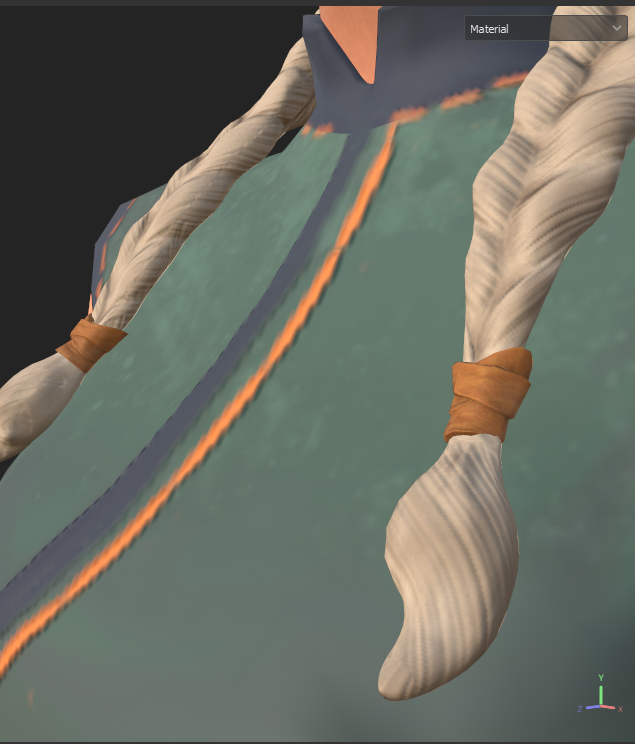
I used a simpler method of twisting one cylinder several times, duplicating and putting the two cylinders together, making sure to make one higher than the other and then sculpting the details on them, keeping the polygroups separate so I could isolate and adjust the position of the braids. The twist already made the braids look believable so I just used curve bend to adjust their position on the head.
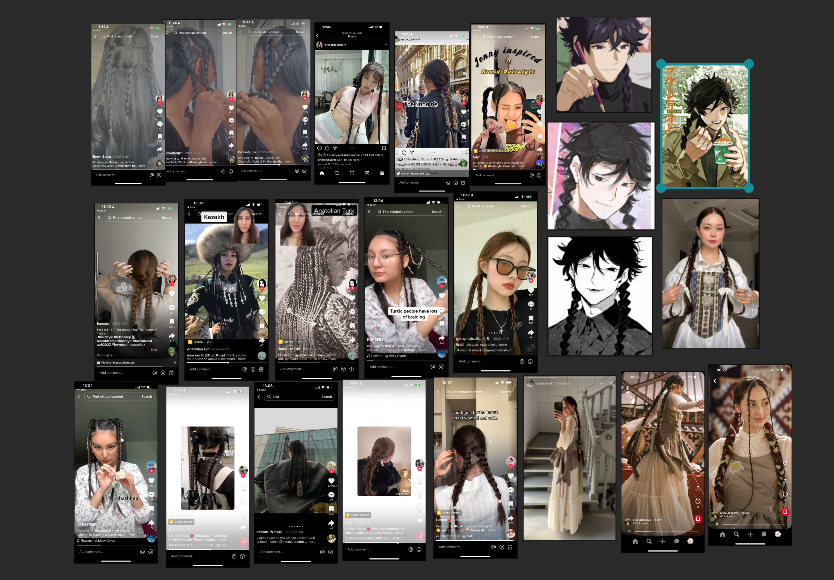
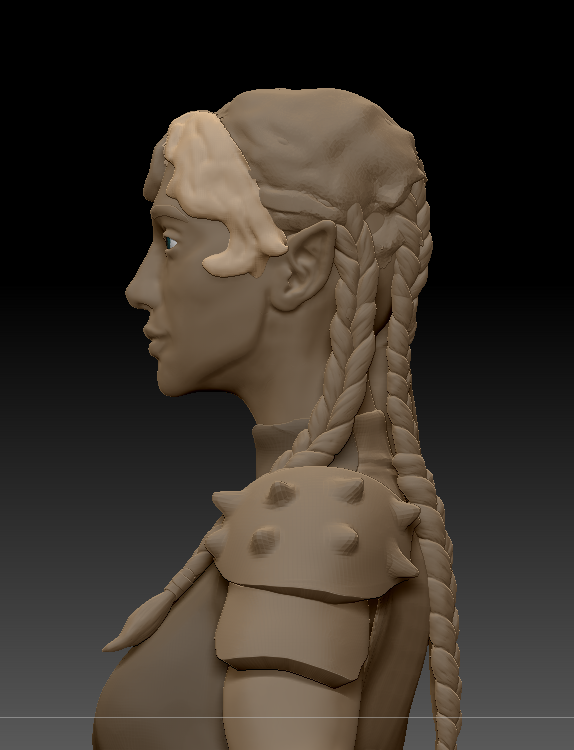
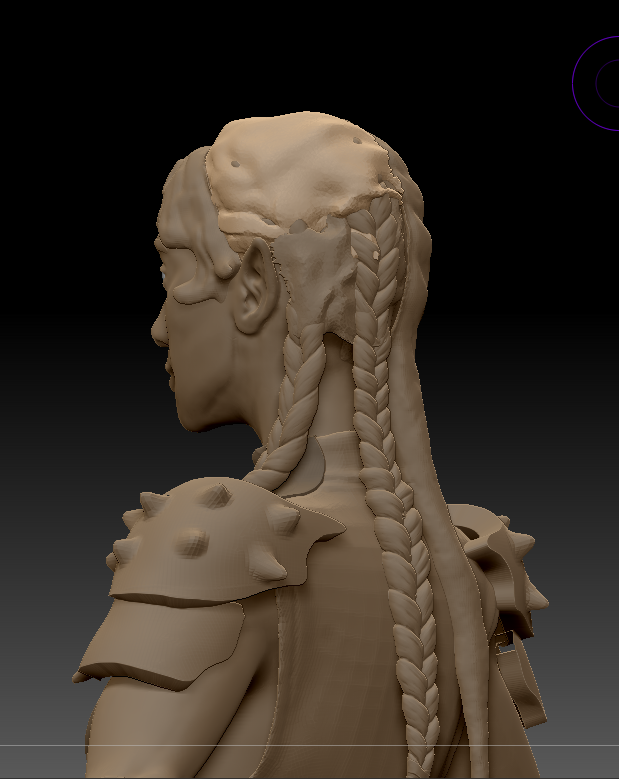
At first I wanted to sculpt four Dutch braids starting from the top of the head but it did not look quite the way I wanted so I took to the internet to search for more references to understand how quadruple braids could be made. In this task I found tiktok creators very heplful. Turns out there was a Korean celebrity, Sana from Twice, who wore a similar hairstyle and people figured out how to replicate it. I tried braiding it on my own hair to see how that braid works, such as which part should be on top and how to sculpt that overlap. With that as reference I sculpted the braids into the base hair. After that I used twisted cylinders and bend curves to make her bangs. I tried randomly sticking out small strands from the hair to make it look more ruffled, and to finish I sculpted in some hair texture details with a DamStandard brush.
Because of how I made the braids the topology on them was not ideal but it was good enough for me to be able to texture it. I did not use hair cards because I was satisfied with the results but it is something I want to try next time.

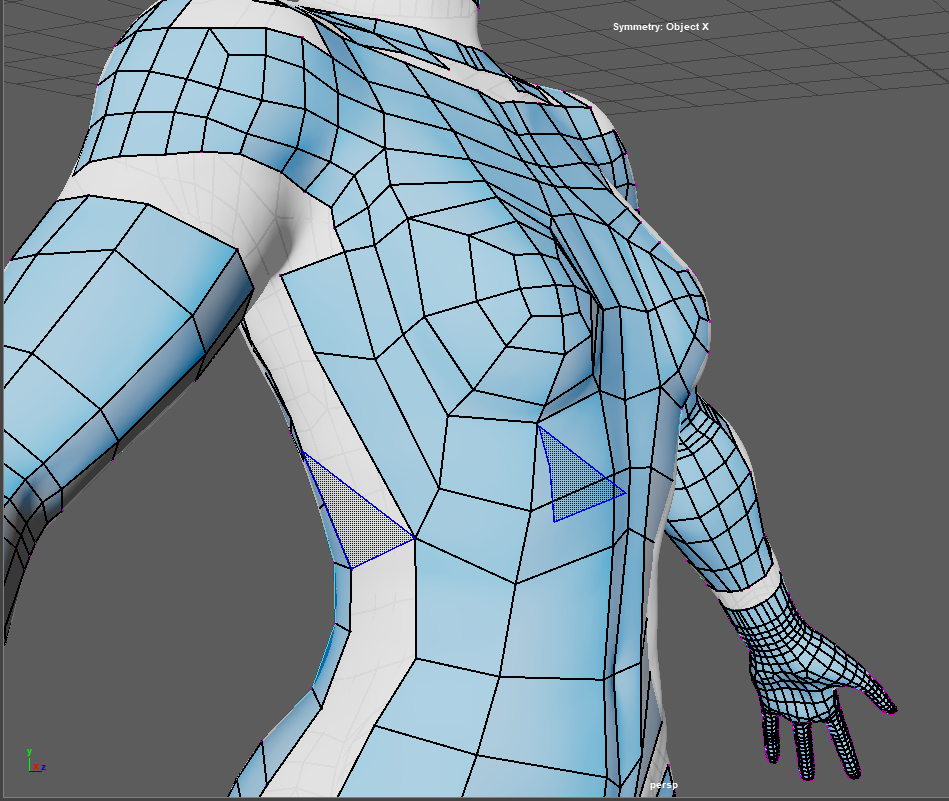
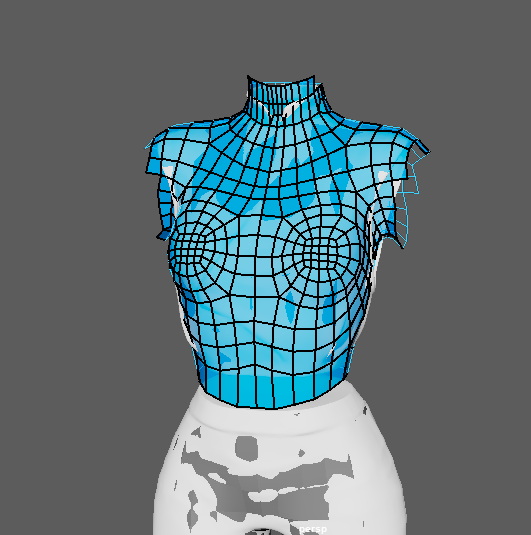
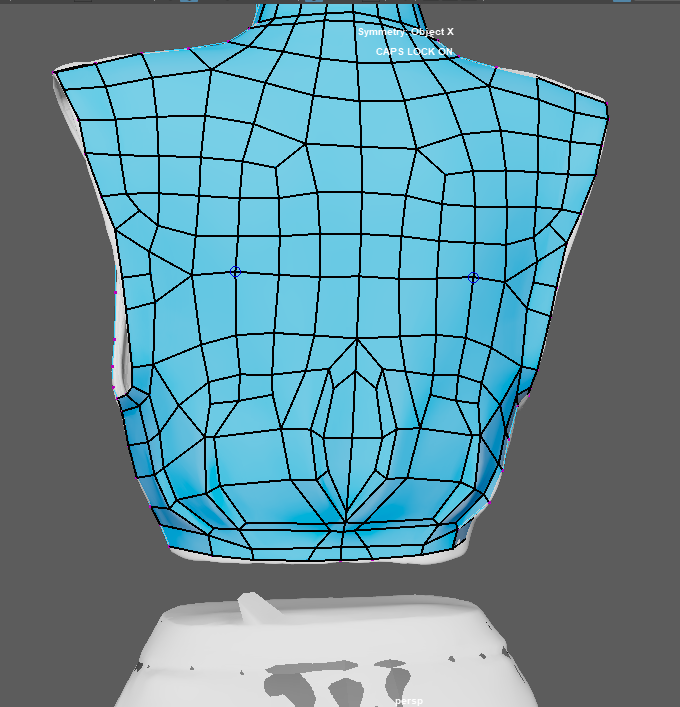
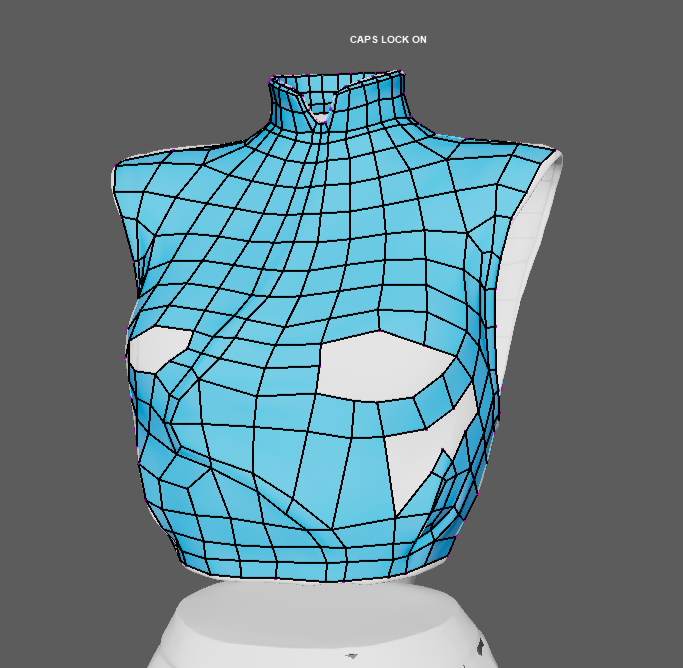
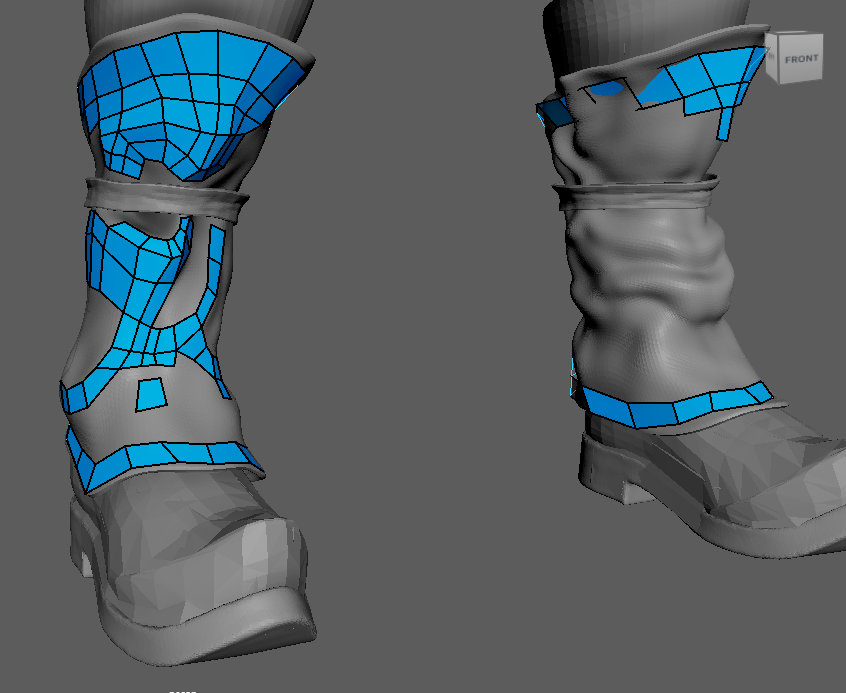
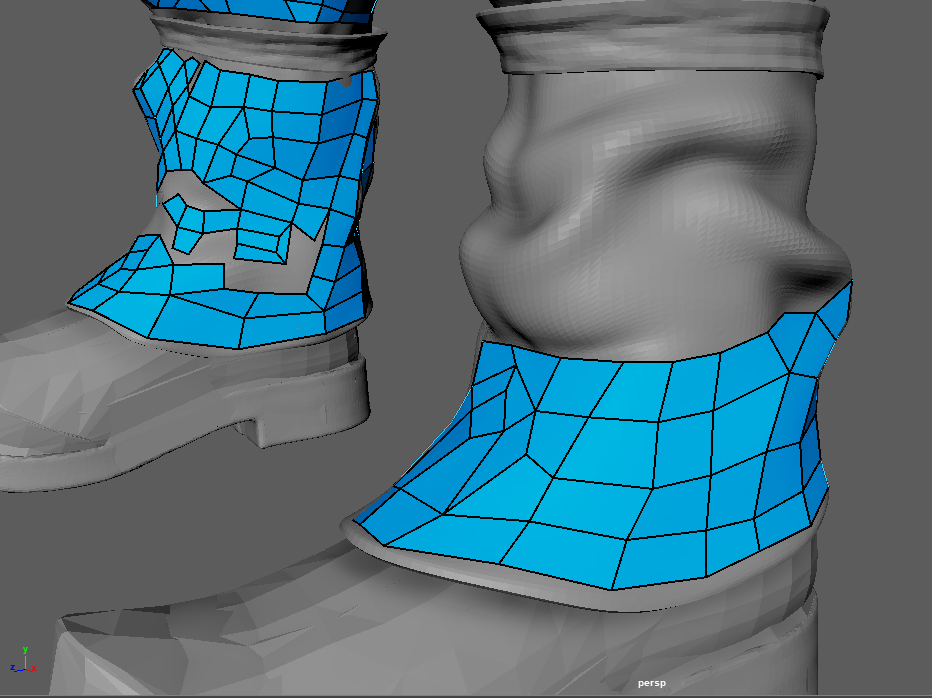
Retopology
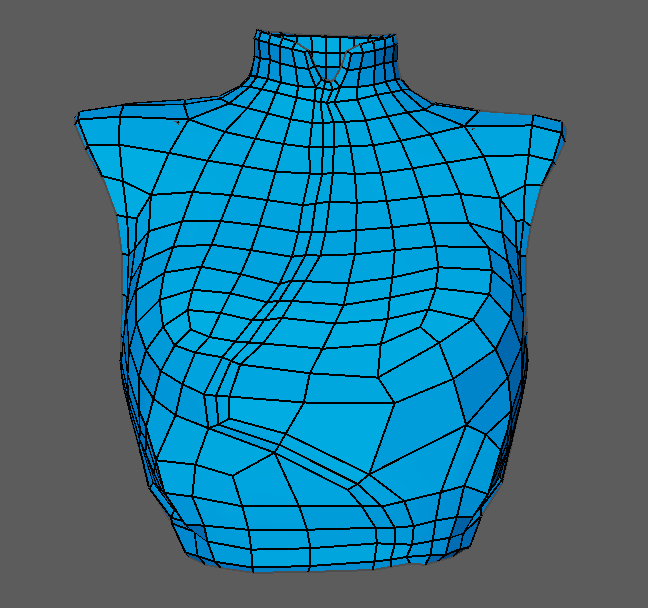
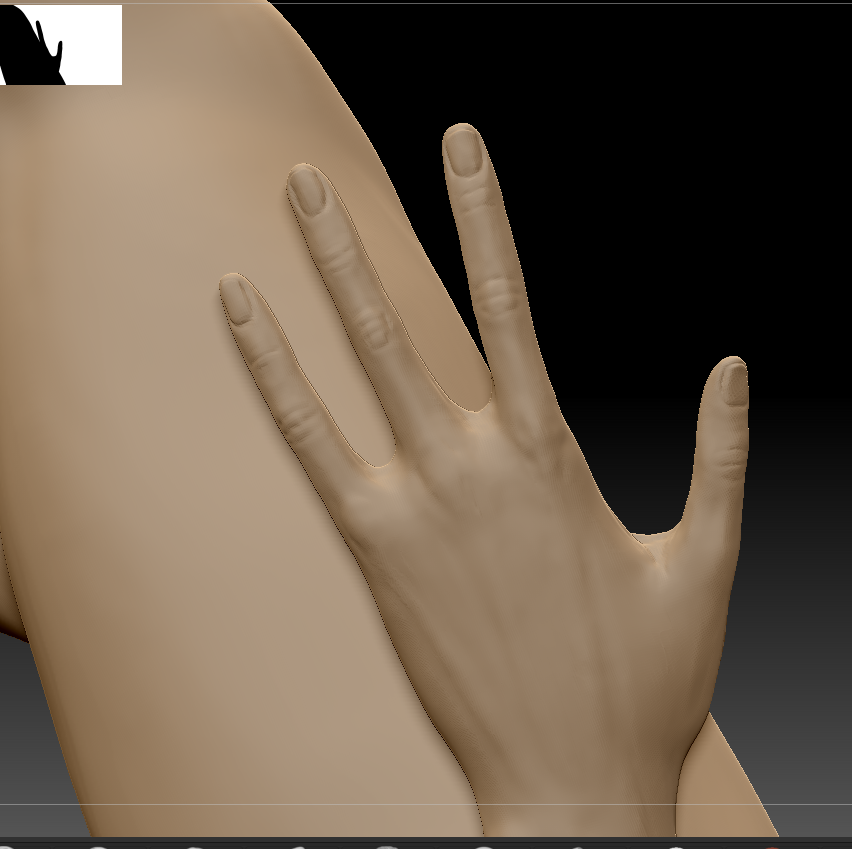
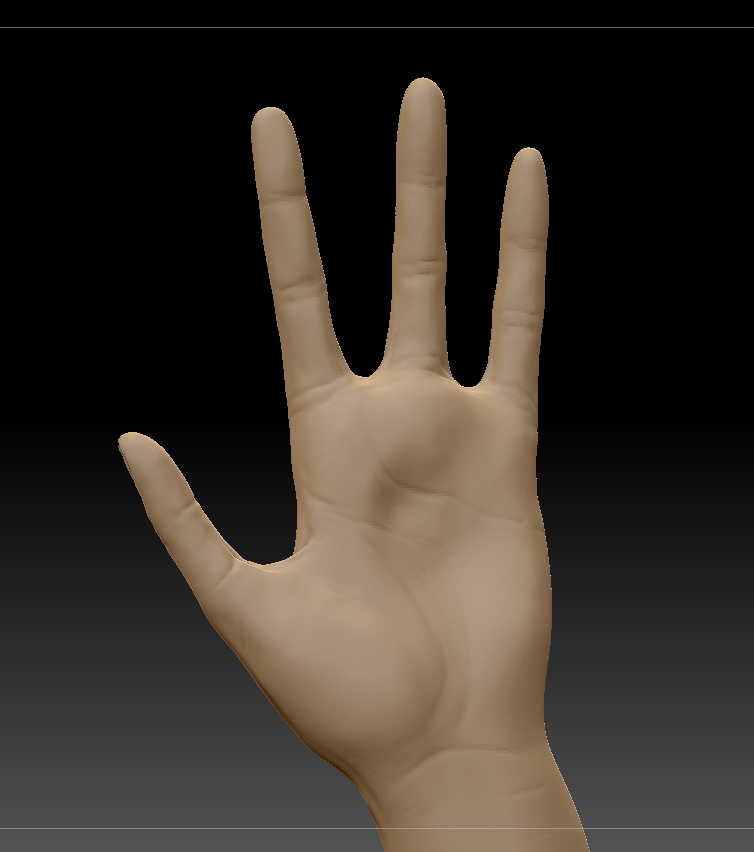
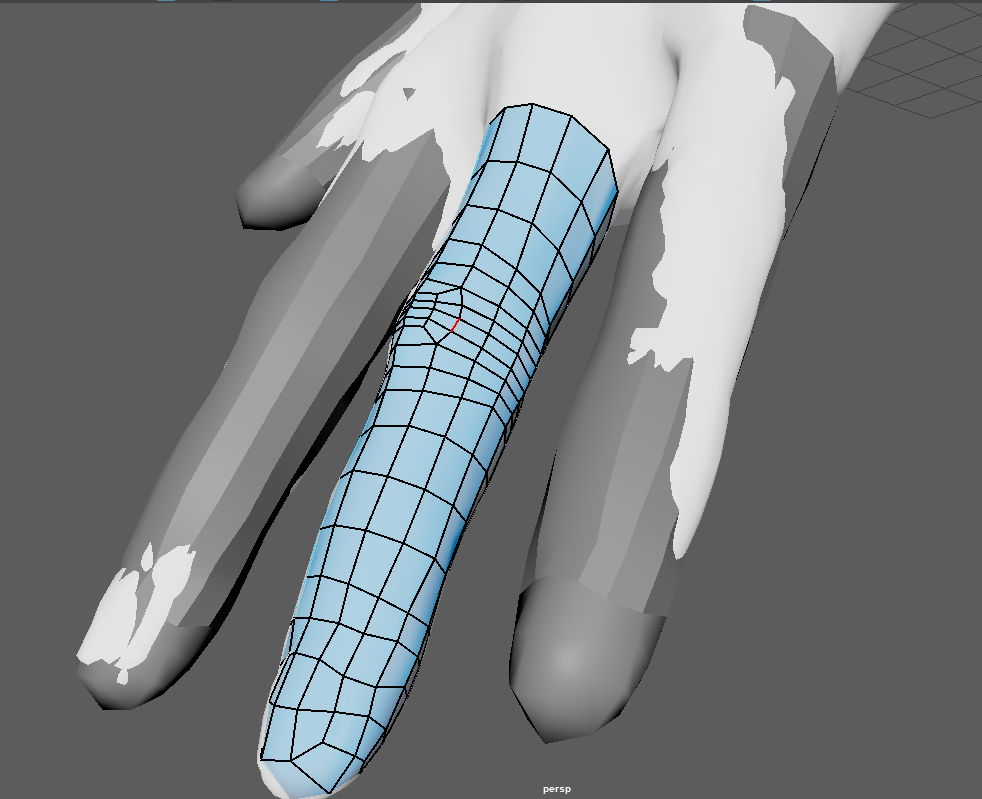
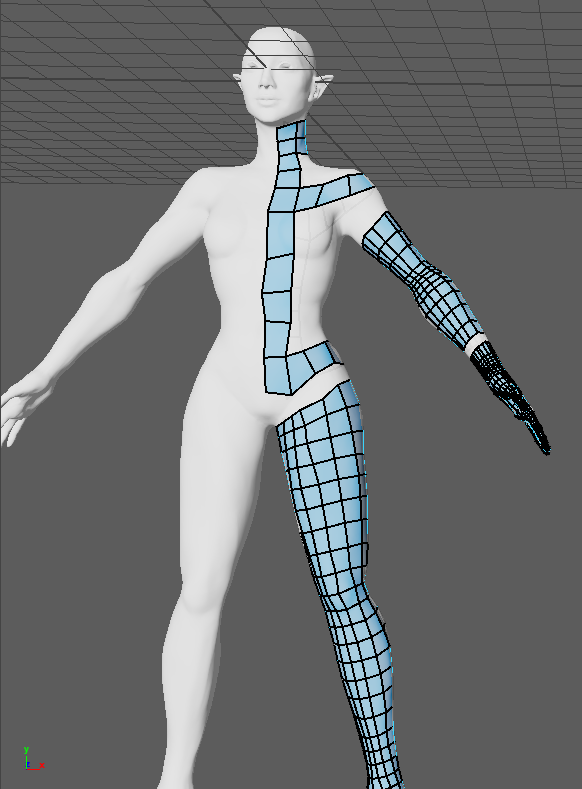
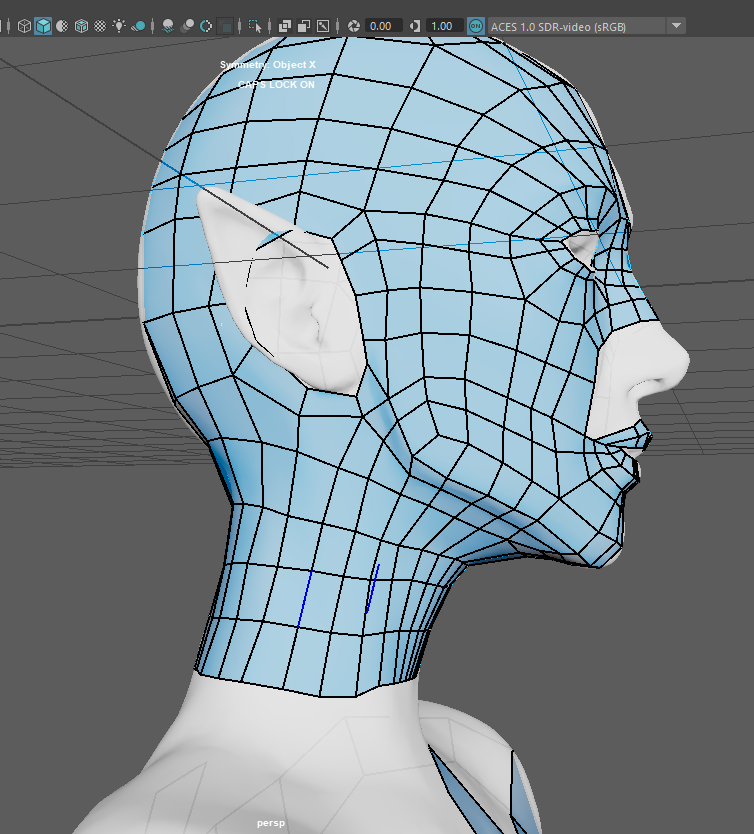
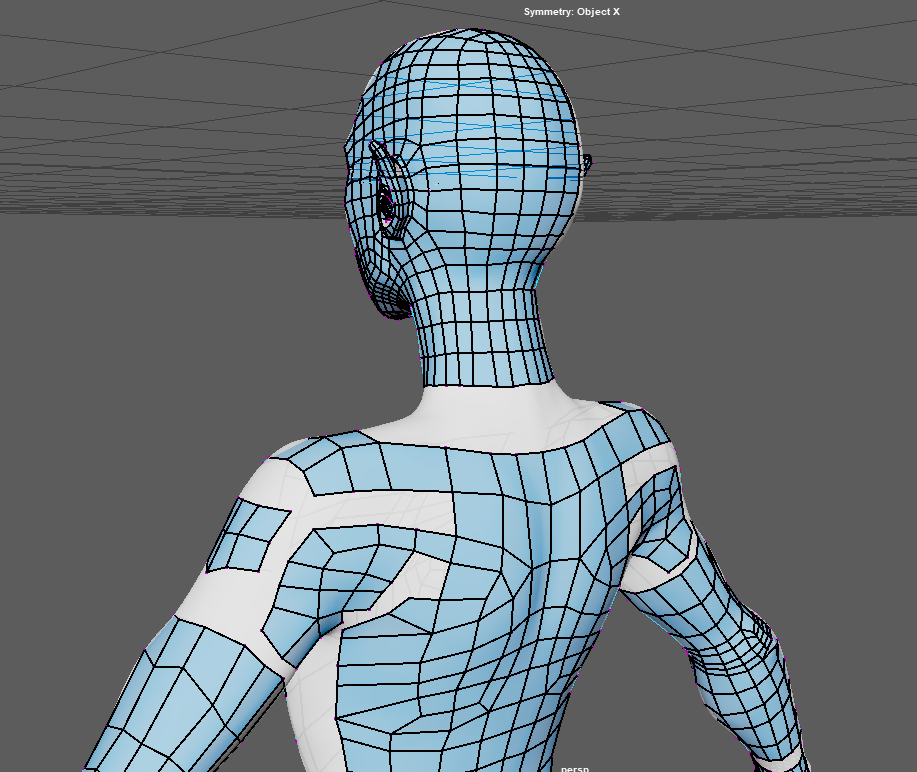
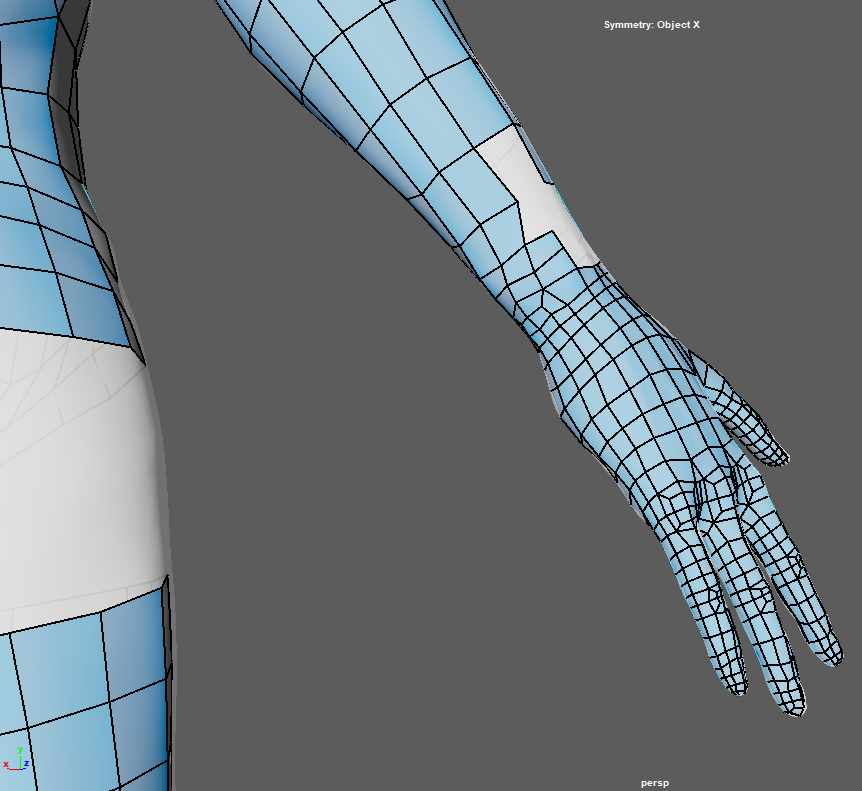
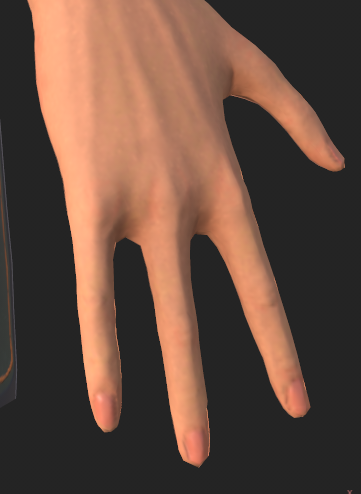
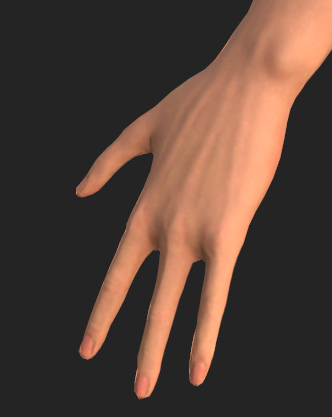
For retopology, I began with the finger; edited cylinder to block out a finger, edited in quad draw and duplicated it and fit to other fingers. I was following 3D mutiny’s video on finger retopology. Then I blocked out main areas of the body kept quad drawing while following along with yet another tutorial.
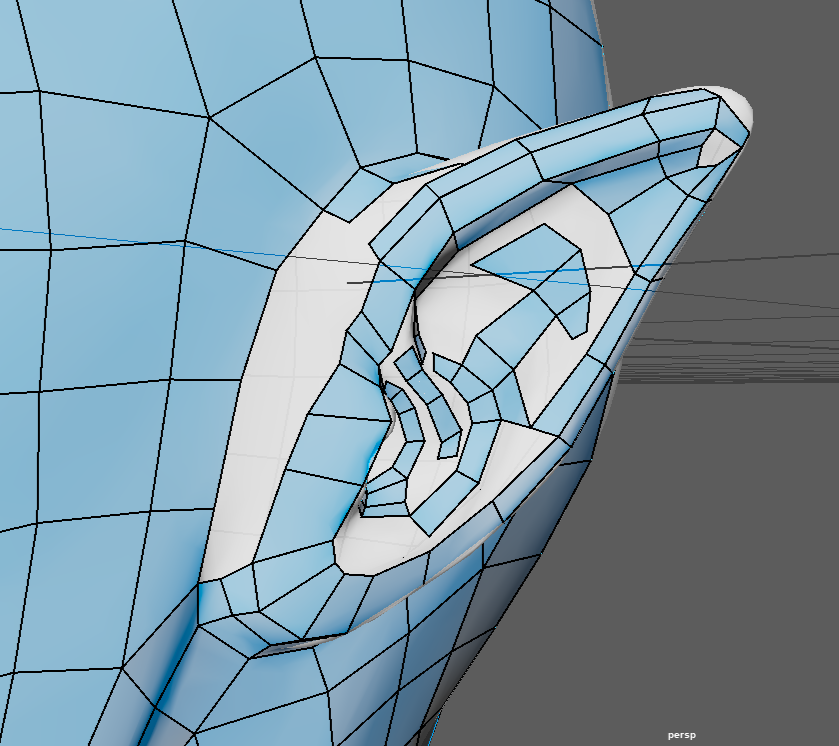
What stumped me was areas like hips, neck, ears and eye/mouth spaces. Because my character’s ears are pointed and were just not looping right so I had to retry a few times to make it work.
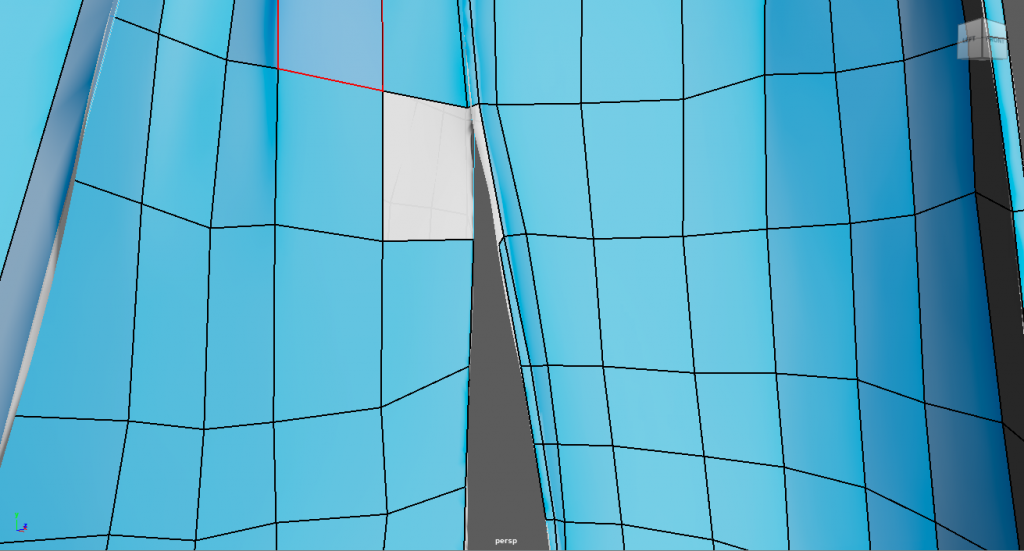
Another challenge was retopologizing fabric folds. I realized at this stage that I should have picked less folded fabrics. In sculpting stages I felt that I was over or under defining folds and in retopology I was trying to make it work because it’s hard to define cloth folds without triangles.
I tried starting bigger and going into details later but I am still developing that patience. I feel like I need more understanding on how certain loops affect the model
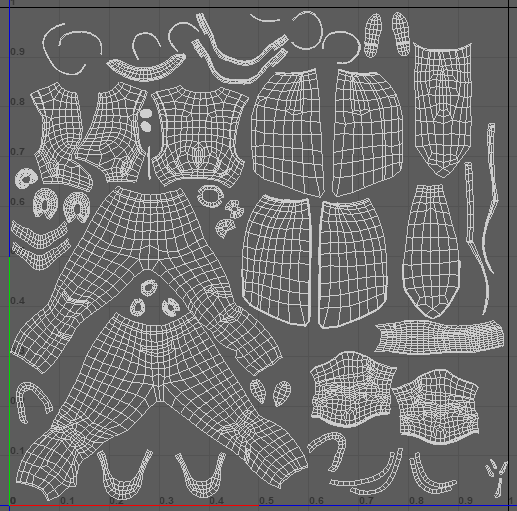
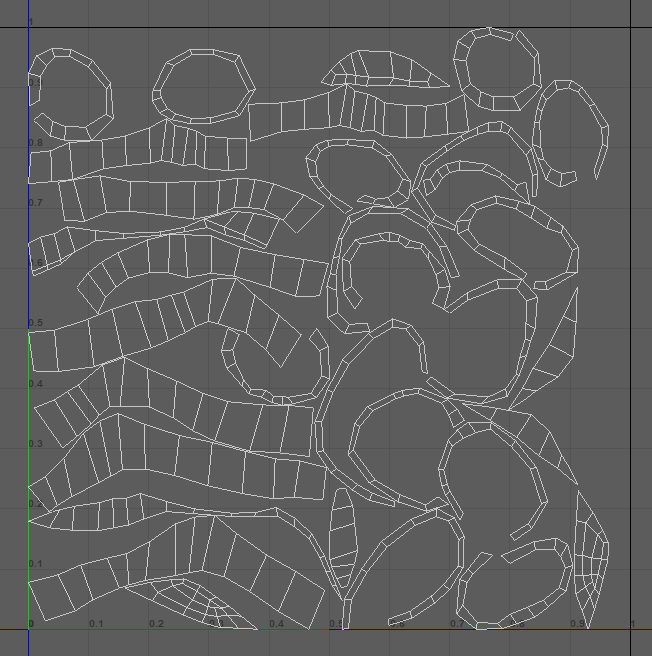
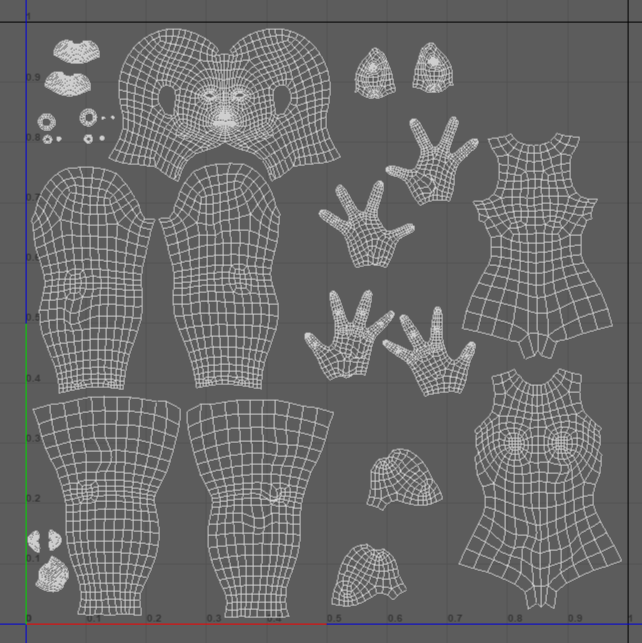
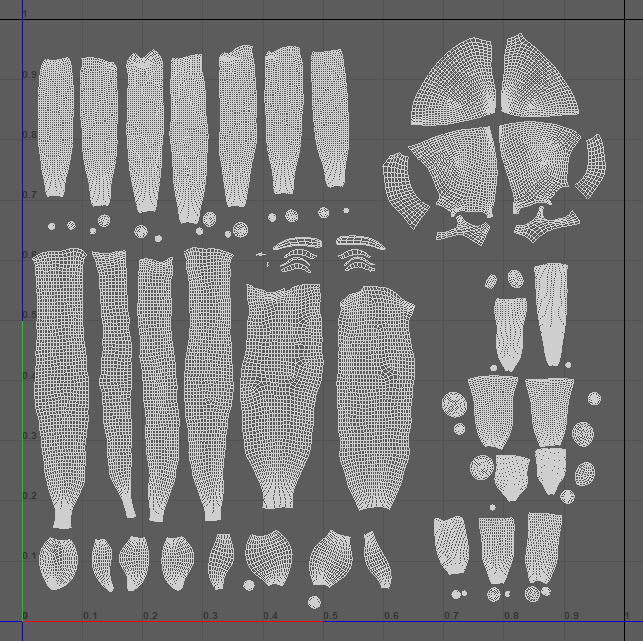
UV Unwrapping
It was actually simple to unwrap the uvs. I followed On Mars 3D tutorial for unwrapping and texturing. Layout button to clean up. On Mars 3D tutorials for us unwrapping and texturing
For uv I unwrapped lowpolys and then decided to separate body, hair and clothes into different layouts. Or add everything into one like they do for games
Vest and skirt are the same fabric so they are in one layout. Body is separate and shoes and trousers are together. Hair is separate. In hindsight I should have planned this better but this grouping worked too.
Texturing
Texturing was interesting but I need to be more mindful of how to separate and group the uvs on one map. I heard some game characters would all be on one UV but for my project I had several uv groups for better quality and simpler texturing. However, because I added all the clothes to one map while having a separate map for a belt and hair ties it really showed the difference it made in texturing quality. I also realized that I could have made the model more efficient by grouping the object differently, like having the vest and skirt be one subtool from the beginning instead of attaching the skirt to the belt. I should have mapped body with eyes, hair with hair ties, belt with vest, and shoes with trousers. That way I could have better resolution as well as adjust the interaction between the assets that are touching each other better.
Rigging and weight painting
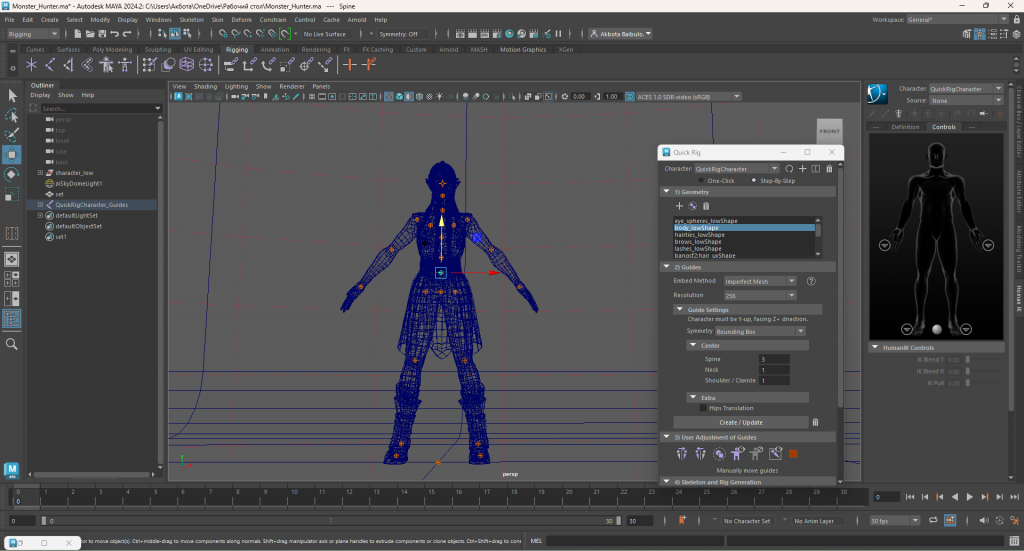
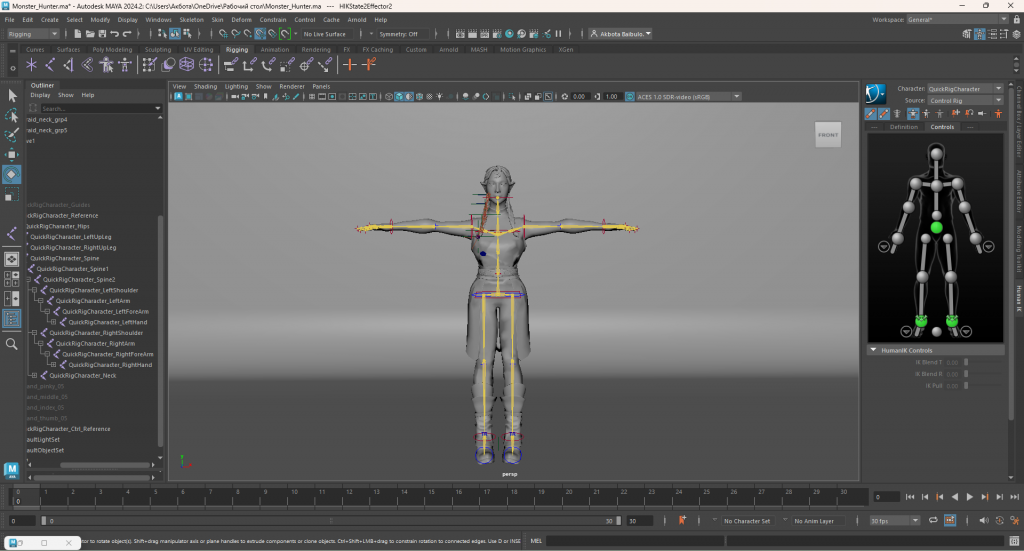
I used quick rig to create the body and added hand separately. I simply edited the weight painting to make the movements smoother. Maybe because the eyebrows were just the planes but while animating I saw the eyebrows would just have the life of their won.
The tutorial I watched on the topic mentioned that Quick Rigs can be used for NPCs and simple animations whereas making a rig from scratch allows for more precise control and more detailed animations where you could squash and stretch.
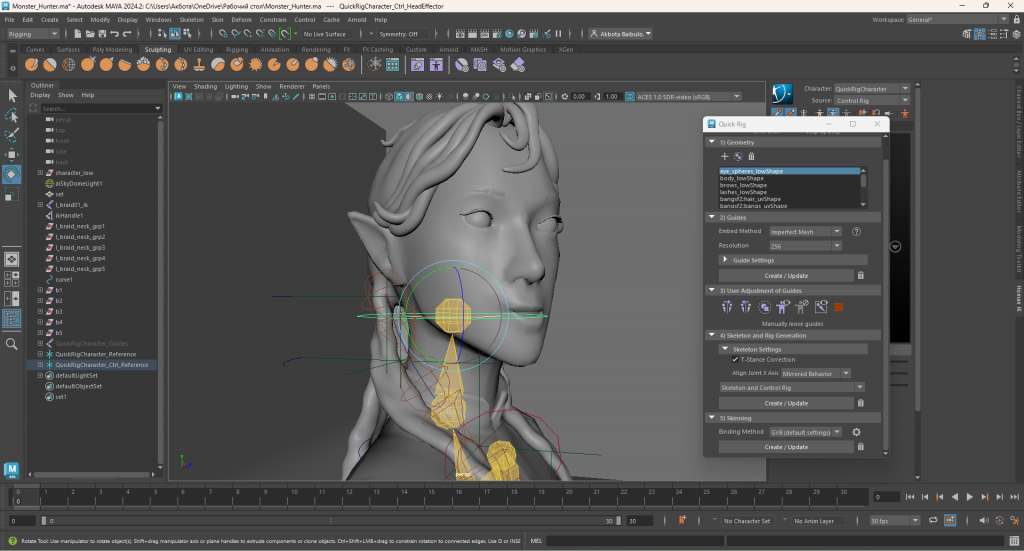
QuickRig fit my needs and intentions or this character so I used this function to get a decent skeleton although I had to add the hands and fingers in myself.
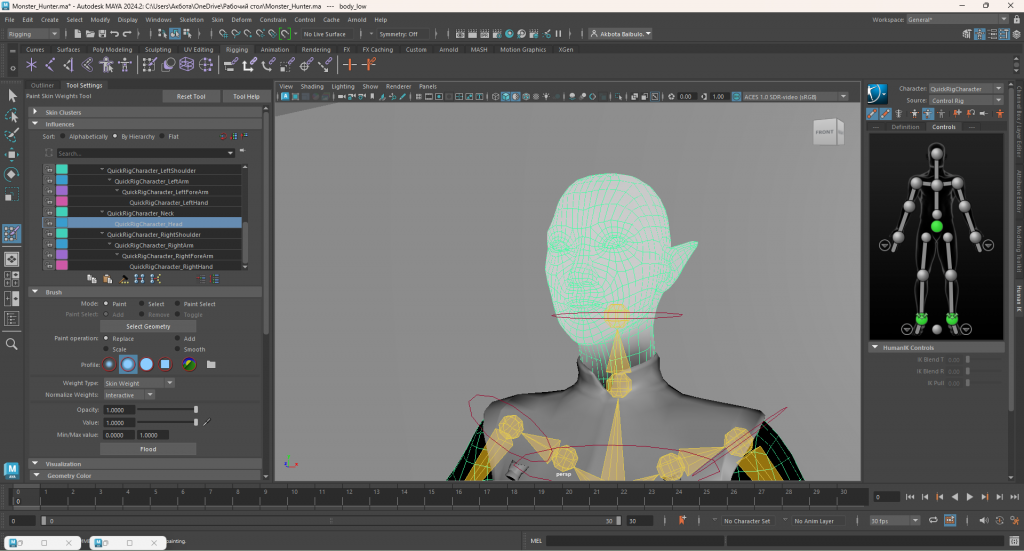
After adding the fingers onto the Human IK the model moved automatically into T-Pose. As that cause the model to deform I moved the rig back into the initial A Pose and deleted history for the model. Then I was able to skin the character in my original pose and weight painted some areas like the forearms, head and shoulders to make sure everything was bending and turning right.
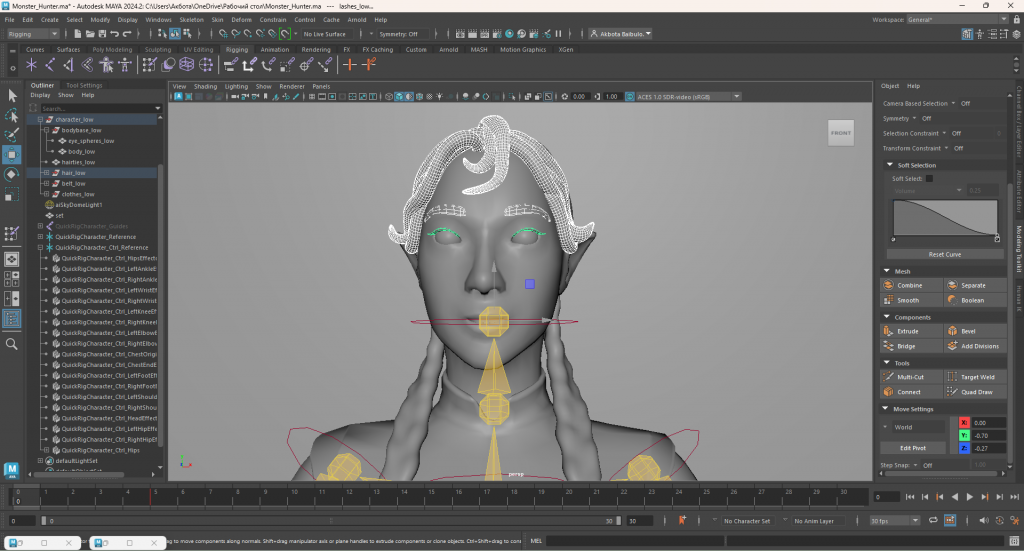
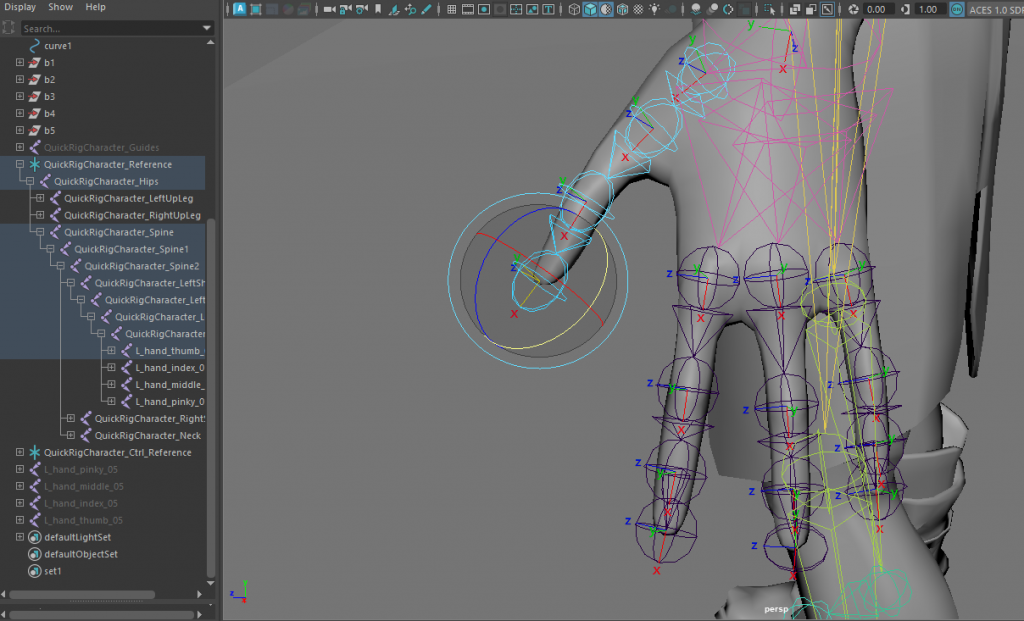
To rig the hands, I added locators and joints from knuckles to the tips of each finger, made sure they aligned in correct places, rotated locators to make sure they would bend in the right direction and then parented each finger to the wrist joint. I then added each joint to the human ik and skinned the skeleton and control to the character.
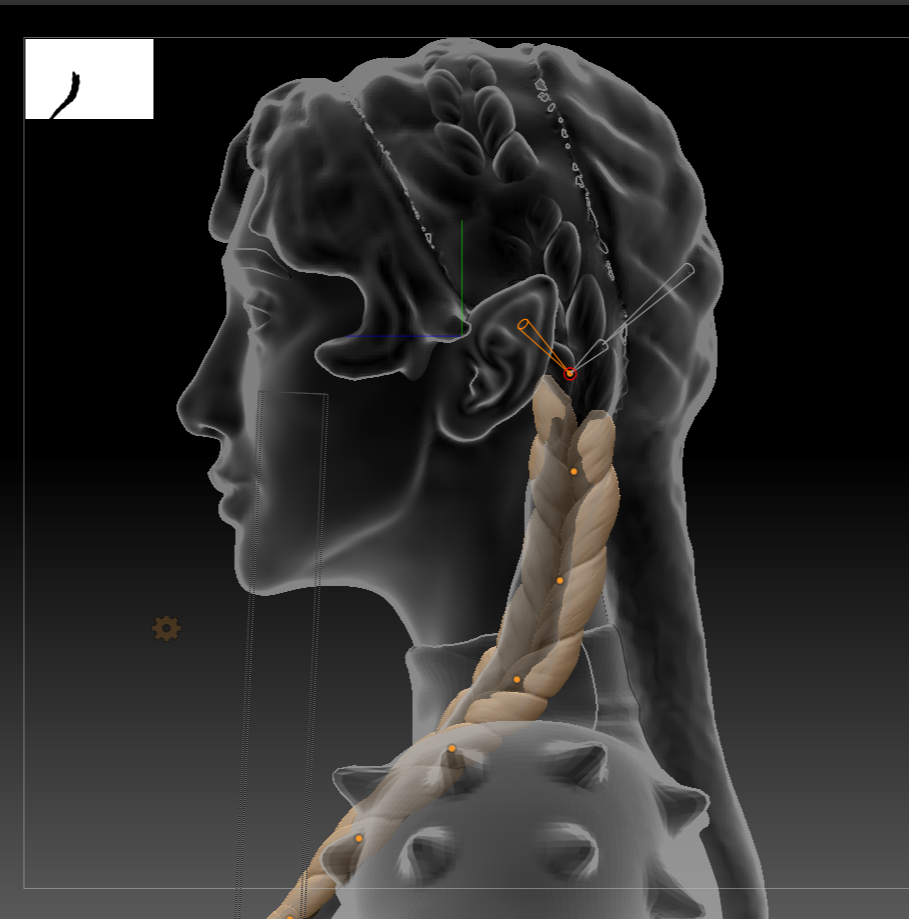
I also made a rig for the braids but ended up not using it as it was not necessary for my animation.

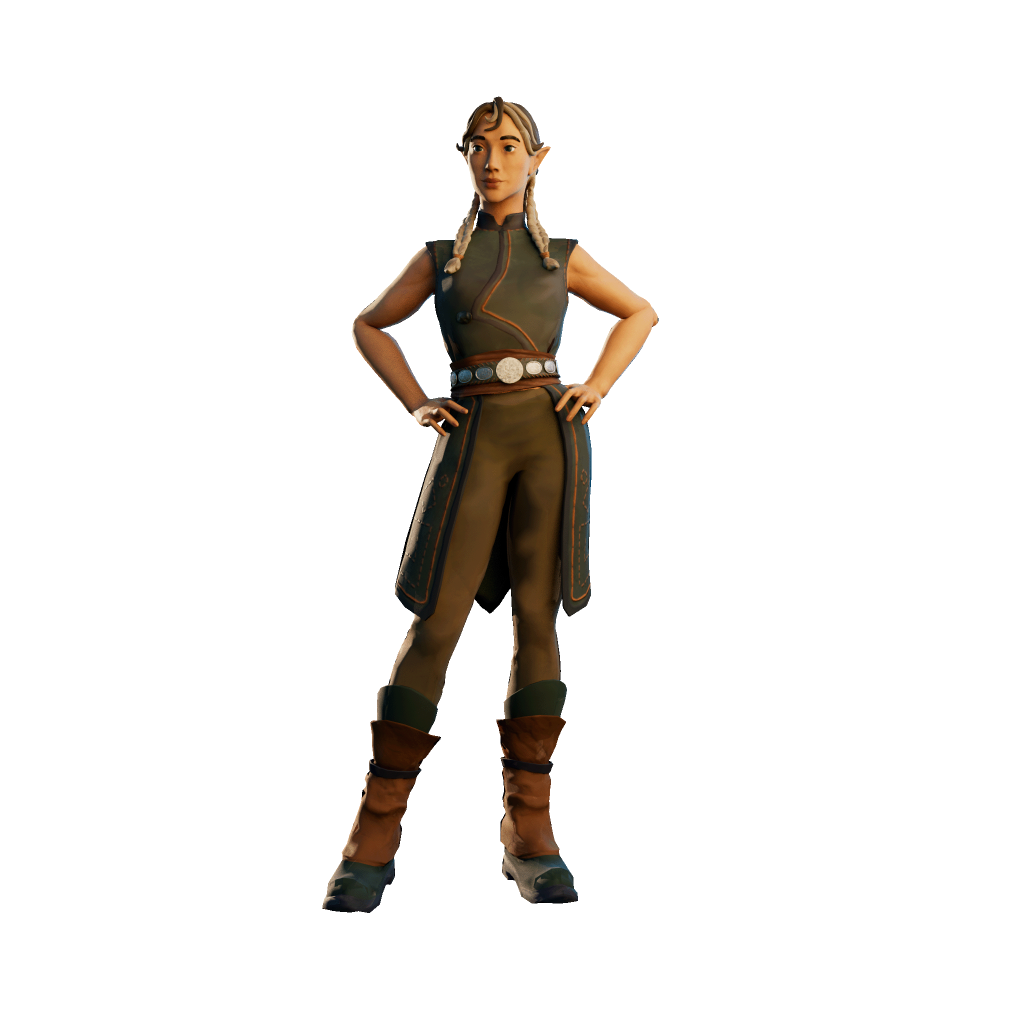
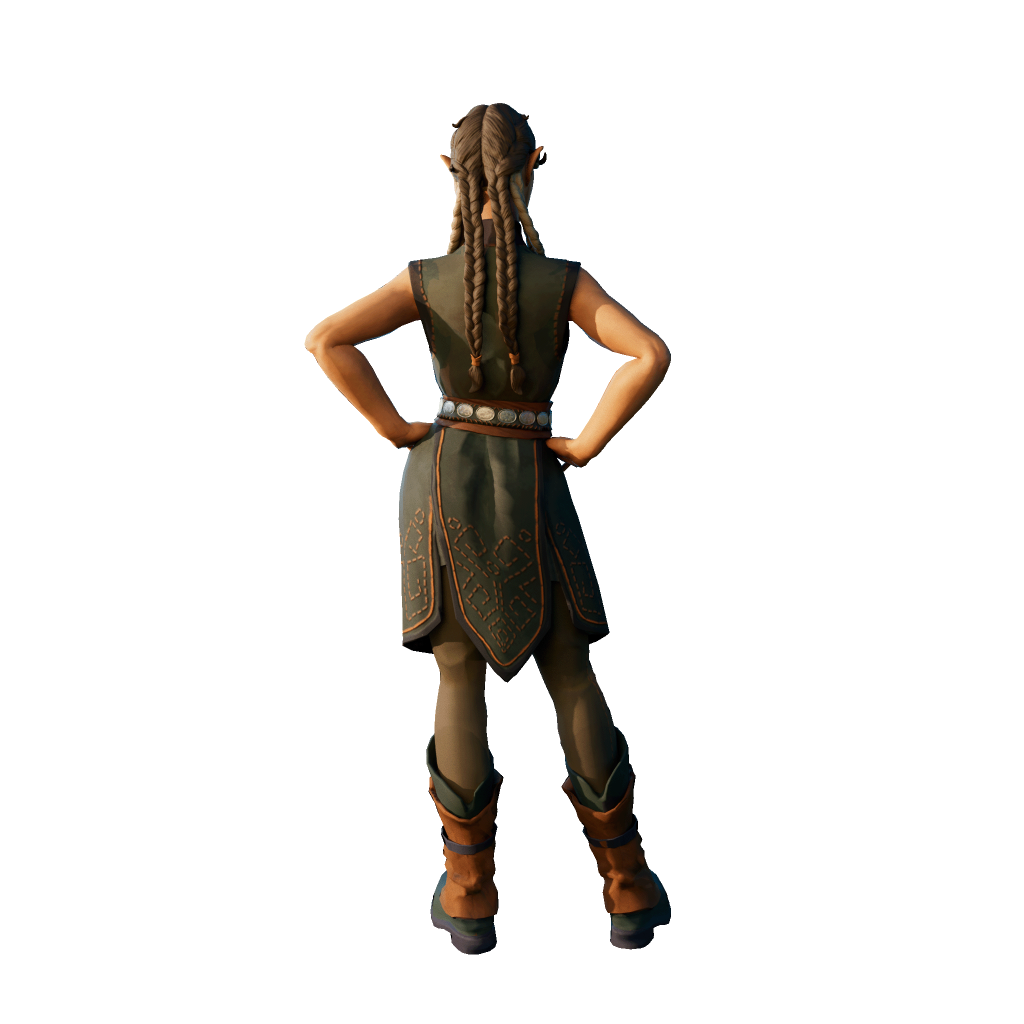
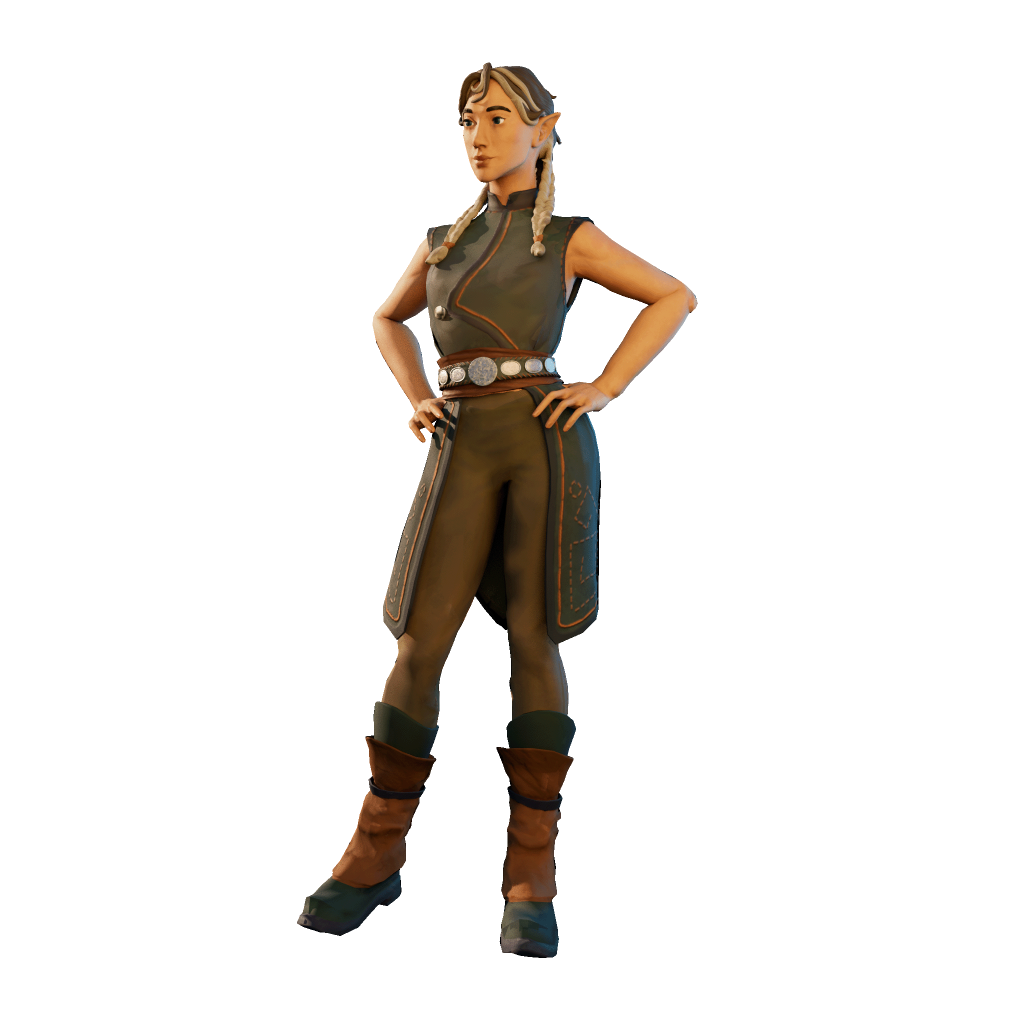
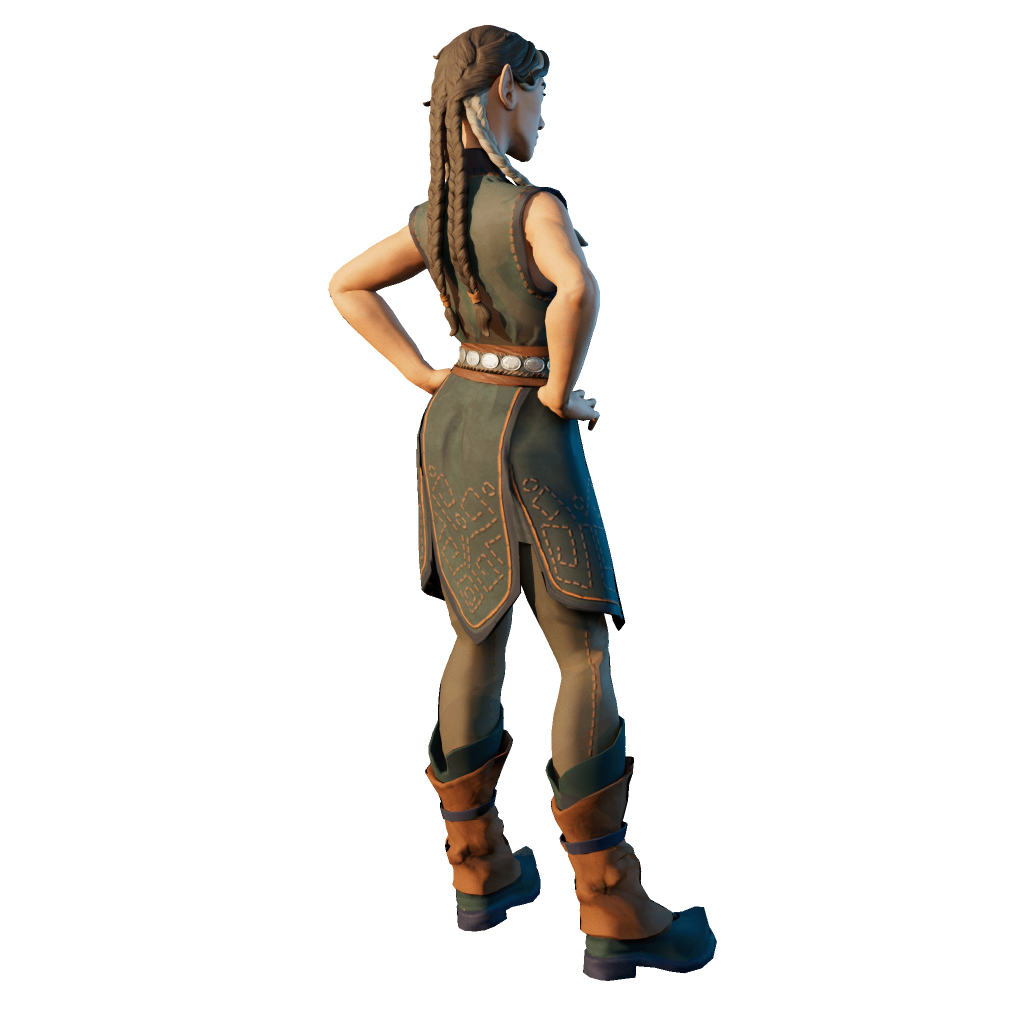
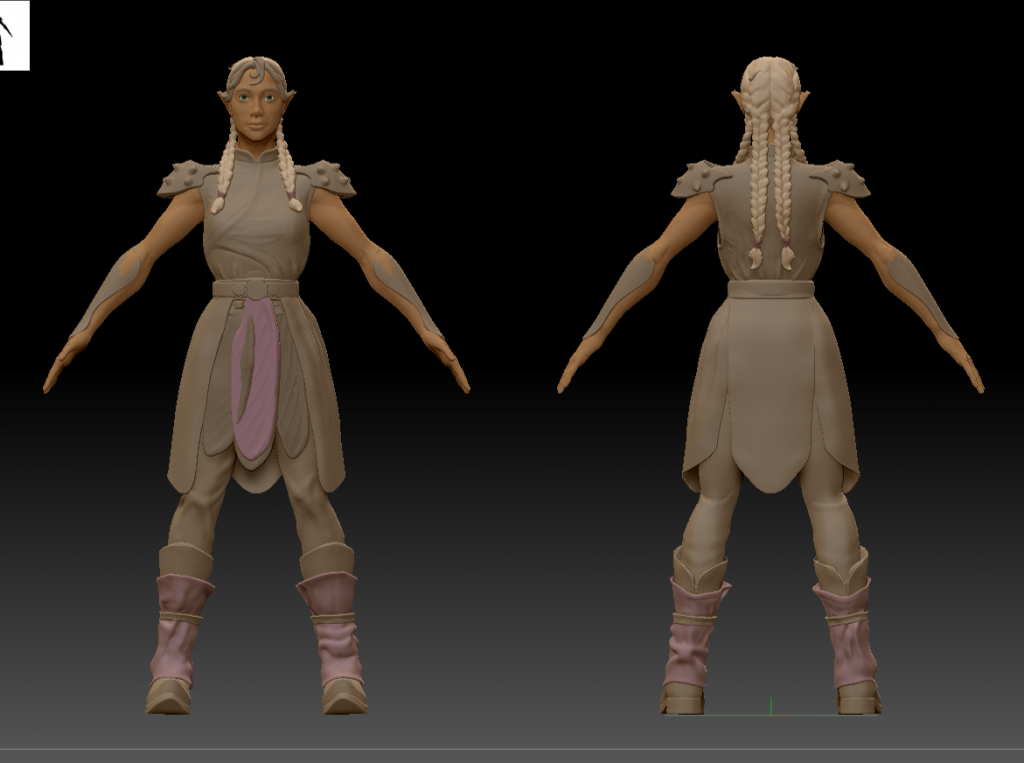
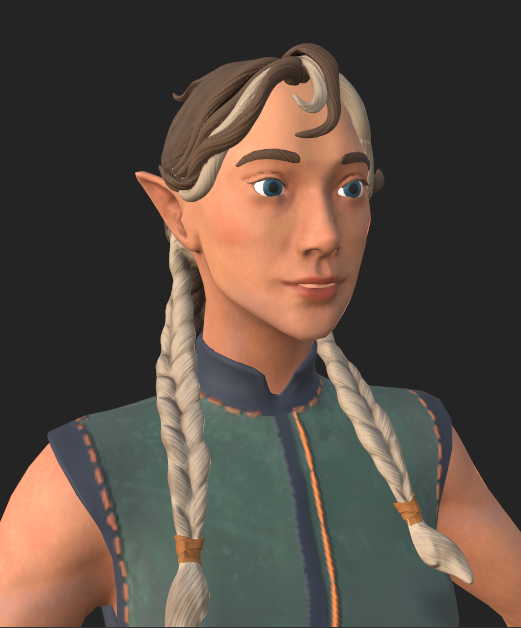
Final 3D Model